The post Protein Cinnamon Rolls appeared first on MattsfitChef.
]]>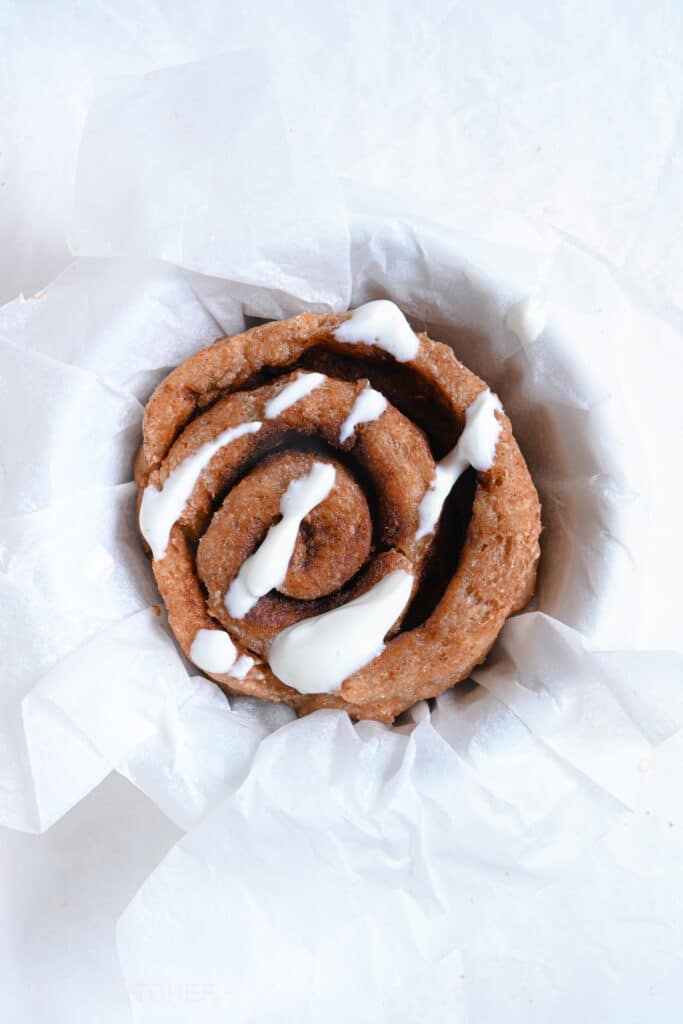
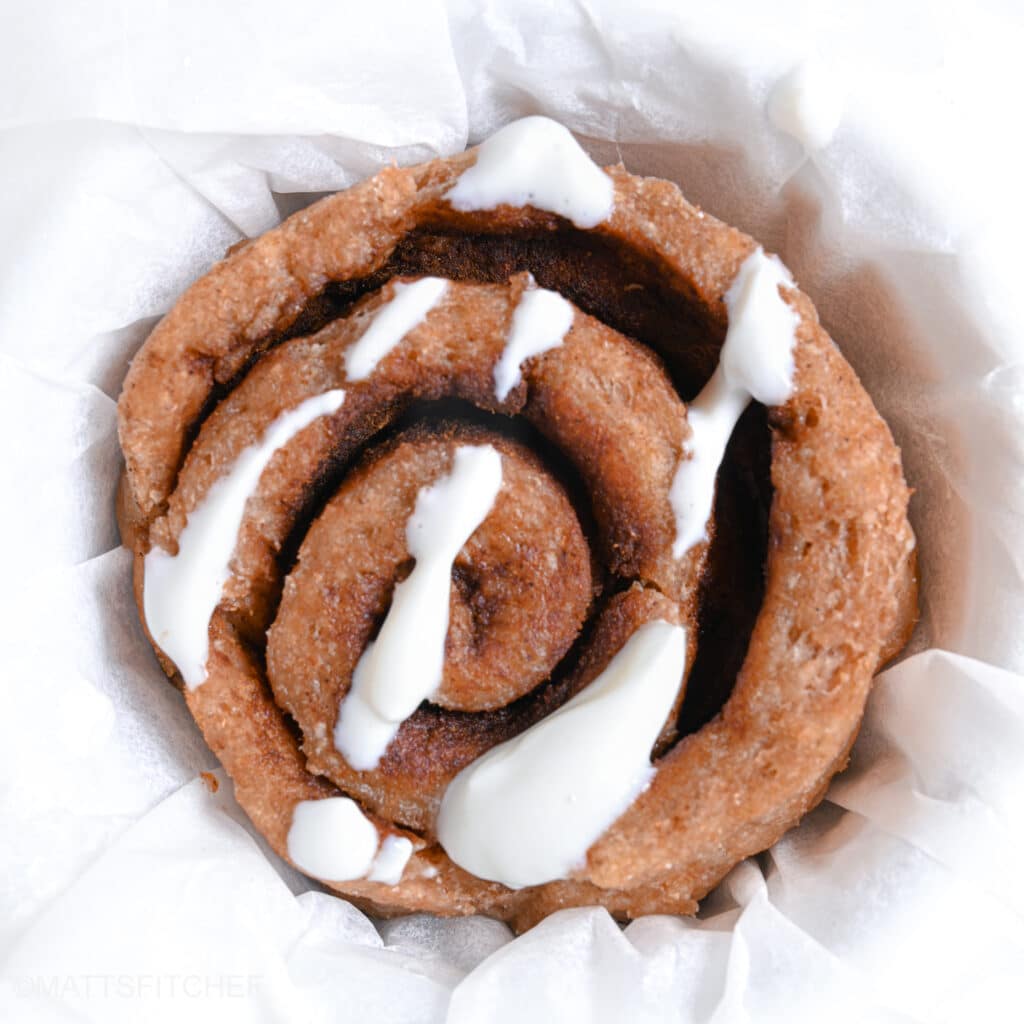
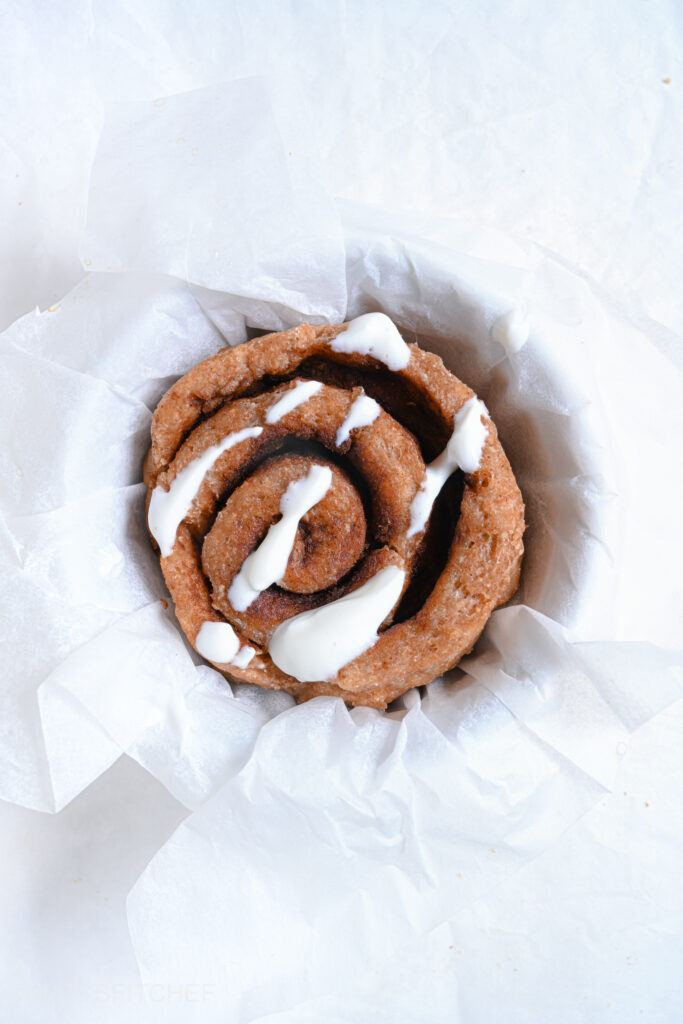
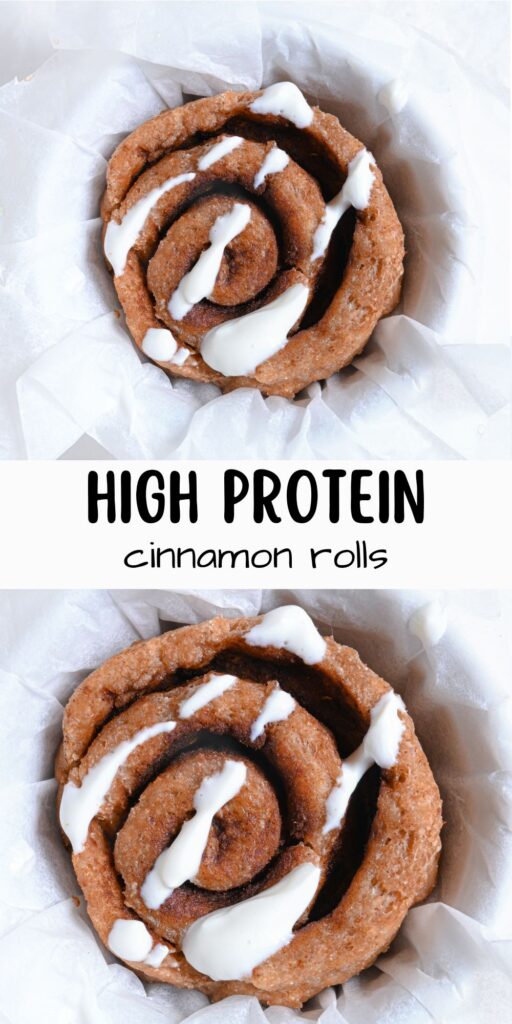
Are you in the mood for cinnamon rolls but don’t want to break your diet? I got you, this recipe is all you need. In this blog post, I am going to unveil the secrets on how to make the best macro-friendly cinnamon rolls ever. They are healthy, high protein, eggless, butter-free and vegan friendly. The best part? They come out so fluffy and delicious, in under 20 minutes. Because there is no need for yeast!
The best protein cinnamon roll recipe: 3 reasons why!
- Quick and easy. Let’s face it, we’re all busy these days. That’s why this recipe is a game-changer. Made without yeast in one bowl, you can whip up a batch of protein cinnamon rolls in no time.
- Healthy and diet-friendly. Unlike high calorie, sugar-loaded buns, this recipe makes healthy cinnamon rolls with Greek yogurt. Whether vegan or dairy-free, with a couple of tweaks you can adjust the buns to fit your diet.
- No protein powder required. Not everyone has protein powder sitting around in their kitchen. Well, the beauty of this recipe is that you don’t need it at all. Just grab some Greek yogurt, flour and you’re good to go. Simple, convenient and budget-friendly, the Greek yogurt is going to give that protein boost you’re looking for.
The ingredients
- Flour: I like white whole wheat flour because it’s very similar to all purpose flour but less processed and more nutritious. Other great options are all purpose flour and spelt flour. Unfortunately this recipe does not work with oat flour or almond flour.
- Greek yogurt: This recipe requires thick Greek yogurt, either nonfat or full-fat. Although both options work, full-fat products tend to give a much richer taste than nonfat alternatives. Use dairy-free Greek yogurt if you follow a vegan diet or can’t eat dairy.
- Maple syrup: A much healthier alternative to refined sugars, the maple syrup is going to give these protein buns plenty of sweetness. As a replacement you can use honey, agave syrup or coconut syrup. For a sugar-free treat, choose sugar-free syrups.
- Baking powder: These are yeast-free cinnamon rolls, so that you will need baking powder for them to rise and get fluffy.
Healthy cinnamon filling
- Granular sweetener: For sugar-free cinnamon rolls that are lower in calories and carbs, this recipe uses erythritol. You can replace with another keto granular sweetener (such as xylitol), coconut sugar or brown sugar.
- Cinnamon: This is a key ingredient for cinnamon rolls. Out of convenience I like using ground cinnamon, but you can also grate it from cinnamon sticks.
Healthy yogurt icing
These protein buns come with a yogurt based frosting that is sugar-free, low in calories and packed with extra protein. Although it is optional, the icing will give your rolls their traditional vibes. It’s very simple to make, you only need 2 basic ingredients:
- Greek yogurt: I opted for nonfat Greek yogurt, which is going to add additional protein to your guilt-free treats. Substitute with full-fat Greek yogurt, Skyr, quark, soy yogurt or any plant based alternative of your choice. Also cream cheese works great.
- Granular sweetener: Same as before, you can swap out erythritol for your favorite granular sweetener, coconut sugar or brown sugar.
Vegan protein cinnamon rolls
If you do not consume dairy, no reason to worry. After some changes, you will be able to prepare your fit rolls at home too. All you should do is to replace Greek yogurt with a plant based alternative of your choice, making sure to prefer a dairy-free yogurt from a thick consistency. If you make this recipe with a liquid (“runny”) yogurt, the dough will get pretty sticky and hard to handle.
How to make protein cinnamon rolls?
Make the filling. In a bowl, whisk together granulated sweetener and ground cinnamon. Set aside for later.
Make the protein dough. In a large mixing bowl, stir the flour together with baking powder, Greek yogurt and maple syrup. Using your hands, knead the dough for a couple of minutes until it gets smooth. Based on the texture of the Greek yogurt used, you may need to adjust with more flour if the dough is too sticky or with more Greek yogurt if it is too dry.
Make the cinnamon rolls. Roll the dough into a rectangle, brush the surface with melted coconut oil (or melted butter) and sprinkle with the cinnamon filling. Cut the rectangle into stripes and roll each stripe, pressing tightly, to get a cinnamon roll. Once you are done rolling, place the protein buns in a baking dish, greased with butter or (coconut) oil and bake in hot oven for 10 to 15 minutes. When baked, let them cool at room temperature for at least 5 minutes before serving.
Make the healthy icing. In a bowl, whisk together Greek yogurt with granular sweetener. If the mixture is too thick, thin it with about 1 teaspoon of milk. Drizzle over the cinnamon rolls before serving and enjoy!
Storage information
In the unlikely scenario that you have leftovers (impossible for me, they are just too good), here’s how to store them. First of all, allow your rolls to cool down completely. Once cooled, place your protein buns an airtight container and keep in the fridge for up to 3 days. Before serving, quickly pop them in the oven until nicely warm. For a longer storage you can also pack them in zipper bags and freeze for as long as 3 months (after they have cooled, of course). To reheat, just bake until warm.
Recipe tips
- Choose full-fat Greek yogurt instead of low fat alternatives. Your protein cinnamon rolls will have a richer taste and a better texture for just a few calories more.
- Use all purpose flour or wholewheat flour. These are the best options for making fluffy cinnamon rolls that don’t fall apart after baking. Unfortunately, oat flour or almond flour are not suitable for this recipe.
- Fix the sweetness level with as much maple syrup as you feel necessary. I recommend starting with about 3 tablespoons and then add more if you have the sweet tooth.
- Adjust the dough if it is necessary. Different yogurts contain different amounts of water and for this reason they will require slightly different quantities of flour. Get to know your dough: add more flour it is sticky or add more yogurt if it is too thick.
- Brush the dough with melted coconut oil or melted butter before sprinkling the cinnamon “sugar” all over it. Besides helping the filling stick to the dough, it will make the inside softer.
- Serve these cinnamon rolls warm, straight from the oven. This is when they are so soft, fluffy and so delicious.
- Enjoy alongside a bowl of Greek yogurt to load up on protein for the day. And if you want to live the full experience, make yourself a cup of hot coffee, tea or milk!
More protein desserts
- No bake protein balls
- Cookie dough protein bars
- Protein frozen dessert
- Low calorie protein brownies
- No bake protein cookies
- Chocolate protein muffins
- Chocolate protein balls
- Moist protein banana bread
- Pumpkin protein muffins
- Fudgy flourless protein brownies

Protein Cinnamon Rolls
Ingredients
Greek Yogurt Dough
- 210 grams (1 ½ cup) all purpose flour or wholewheat flour
- 1 ⅓ tsp baking powder
- 190 grams (⅔ cup) Greek yogurt
- 2 to 3 tbsp maple syrup or honey, to taste
Cinnamon Roll Filling
- melted coconut oil or melted butter, to brush
- 1 ½ tbsp granular sweetener erythritol or preferred sweetener
- 2 tsp ground cinnamon
Healthy Icing
- 2 tbsp Greek yogurt
- 1 tbsp granular sweetener erythritol or preferred sweetener
- 1 tsp milk if necessary
Instructions
- Preheat oven to 180ºC (350ºF).
Cinnamon Roll Filling
- In a bowl, whisk together granulated sweetener and ground cinnamon. Set aside for later.
Greek Yogurt Dough
- In a large mixing bowl, stir the flour together with baking powder, Greek yogurt and maple syrup. Using your hands, knead the dough for a couple of minutes until it gets smooth.Based on the texture of the Greek yogurt used, you may need to adjust with more flour if the dough is too sticky or with more Greek yogurt if it is too dry.
- Roll the dough into a rectangle, brush the surface with melted coconut oil (or melted butter) and sprinkle with the cinnamon filling.
- Cut the rectangle into stripes and roll each stripe, pressing tightly, to get a cinnamon roll. Once you are done rolling, place the protein buns in a baking dish, greased with butter or (coconut) oil.
- Bake in hot oven for 10 to 15 minutes. When baked, let them cool at room temperature for at least 5 minutes before serving.
Healthy Icing
- In a bowl, whisk together Greek yogurt with granular sweetener. If the mixture is too thick, thin it with about 1 teaspoon of milk. Drizzle over the cinnamon rolls before serving, if you desire.
Nutrition
The post Protein Cinnamon Rolls appeared first on MattsfitChef.
]]>The post Healthy Apple Bread Recipe appeared first on MattsfitChef.
]]>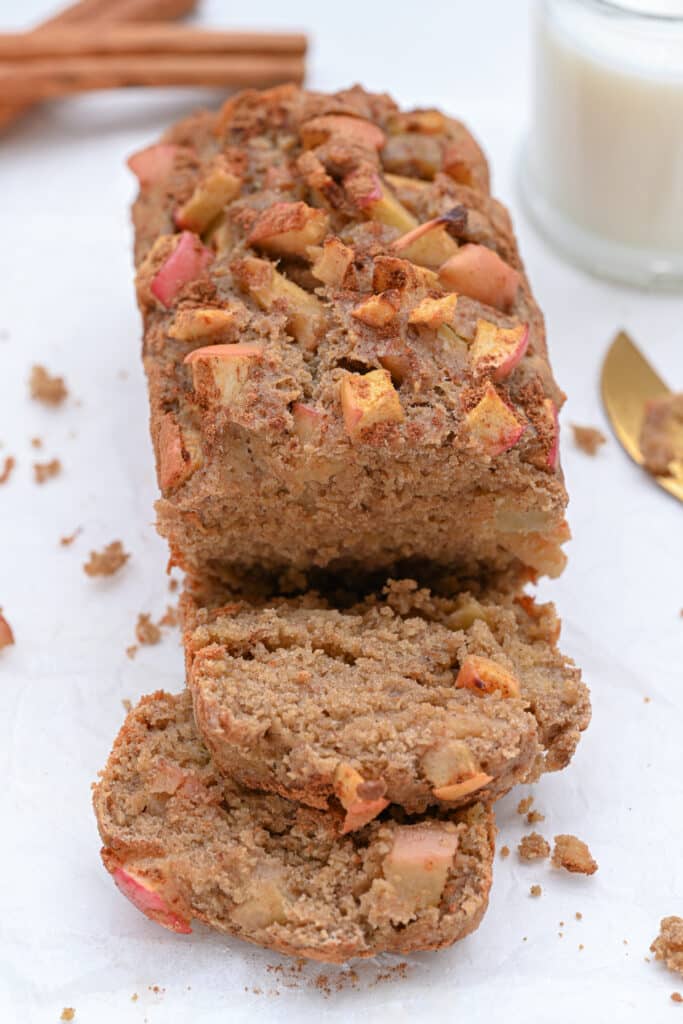
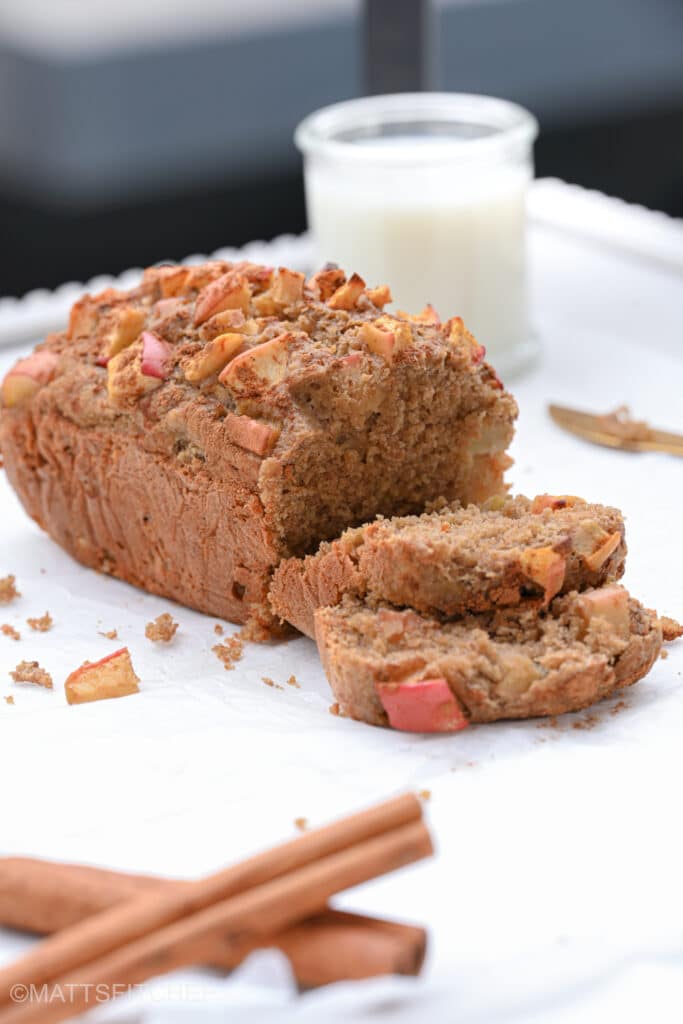
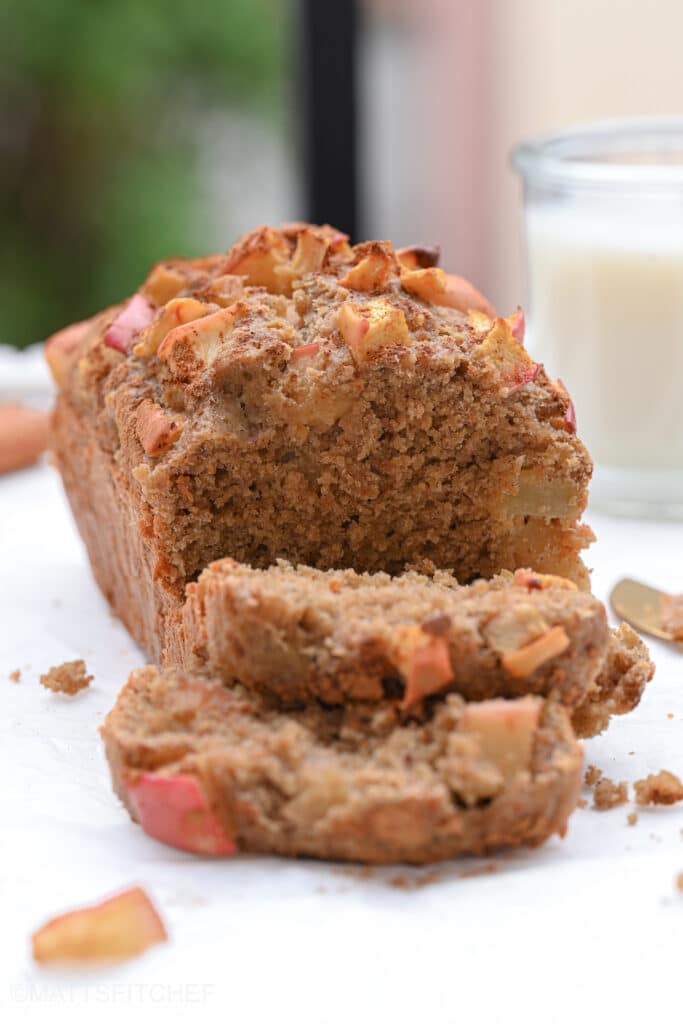
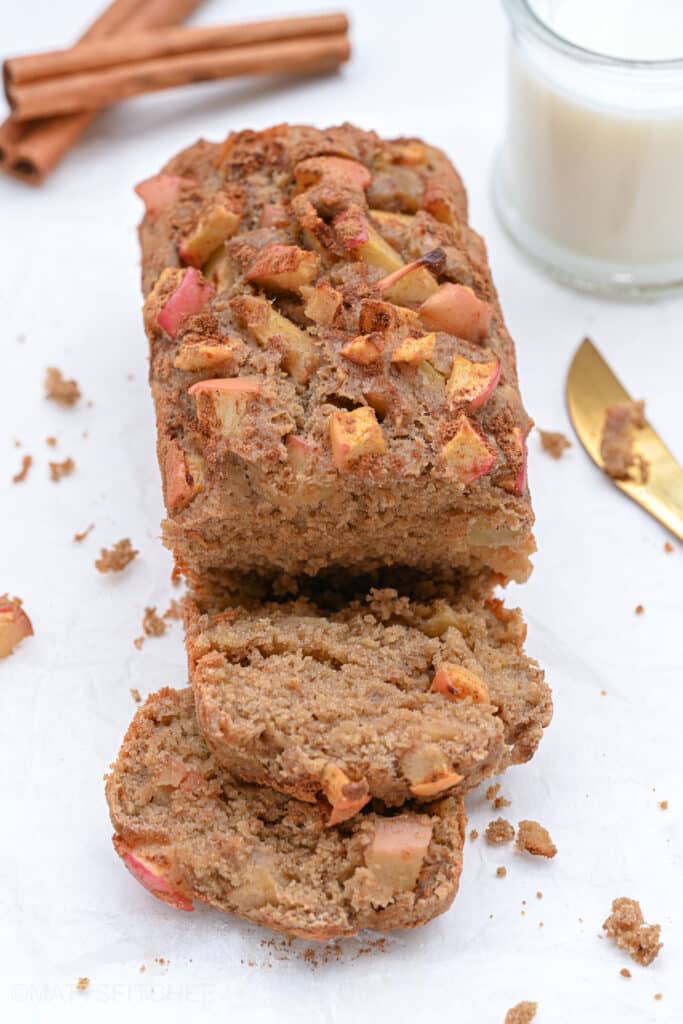
Apple bread, healthy!
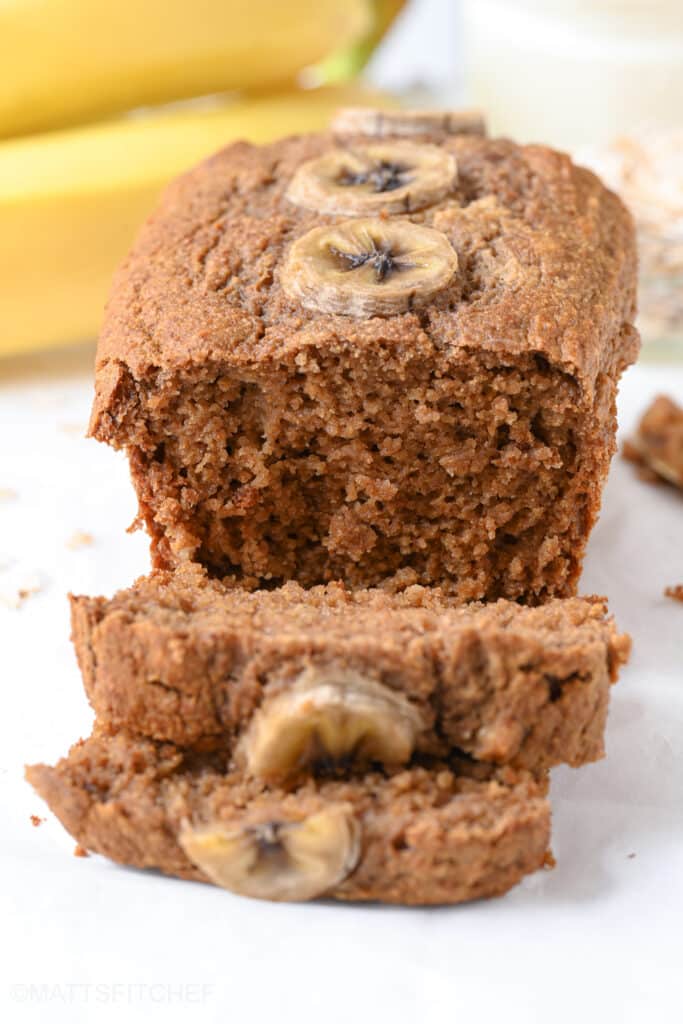
Apple bread, a warm and cozy treat in the form of a loaf. Full of warm spices and flavors, this bread is soft and moist with plenty of tender apple bits. Whether it’s served for breakfast, as a dessert or for a satisfying snack, apple bread is always a good idea! And with this recipe you should not worry, because my homemade apple bread is healthy and nutritious. Here are some reasons why!
- No refined flour: Instead of white flour, my recipe uses whole grain alternatives such as whole-wheat flour, oat flour or spelt flours. This will allow you to put together a healthy loaf that is high in fiber, vitamins, and minerals.
- No refined sugars: As for the flour, you won’t need any refined sugar. We will use maple syrup, which is a great source of antioxidants and beneficial nutrients. What is more, it also has a lower glycemic index compared to white sugar.
- Lower in fats: Including unsweetened applesauce allows you to bake a moist dessert bread with significantly less oil and sweetener. Further, this recipe uses no butter but vegetable oil, which is poor in saturated fats.
- Diet-friendly: Whether vegan or gluten-free, this healthy apple bread recipe can easily be adjusted to suit the needs of your diet or lifestyle preferences. It’s already dairy-free and making it eggless is a pice of cake!
- High protein option: If you are looking for a satisfying post-workout snack or macro-friendly treat, consider using a scoop of protein powder. Just replace part of the flour with protein powder and you’re read to bake!
Ingredients and substitutes
Here is everything you need to make healthy apple bread at home. Besides a description of all ingredients, in the following lines you’ll find plenty of replacement options.
- Apples: The best apple varieties are Honeycrips, Granny Smith, Fuji, and gala. The choice of apple will give you a slightly different result in terms of both flavor and texture. Keep on reading for more details!
- Applesauce: I recommend unsweetened applesauce to whip up a sweet and moist apple bread with less sugar and less fat. If you prefer, use regular sweetened applesauce.
- Eggs: Include two large, fresh eggs to enhance moisture, flavor and texture. The eggs are also necessary to bind the batter, ensuring your breakfast bread won’t fall apart when slicing it.
- Whole-grain flour: I like using white whole wheat flour because it’s very similar to all-purpose flour but with the benefit of being less processed and more nutritious. Other options are whole-wheat flour, spelt flour and all purpose flour. While oat flour still works, be aware that it may give your loaf less moisture.
- Leavening agent: Baking soda is a key ingredient in helping the bread raise and giving it a fluffy texture. You can substitute 1 teaspoon of baking soda with 2 teaspoons of baking powder, the result will be very similar.
- Maple syrup: Maple syrup not only sweetens the breakfast bread naturally, but it also provides additional health benefits. Good alternatives include honey, agave syrup, date syrup and coconut syrup. Bear in mind that granular sweeteners are not suitable for this recipe as they can alter the batter consistency.
- Oil of choice: For an optimal result, use neutral vegetable oil. My suggestions are canola oil, avocado oil, or coconut oil. If you wish, replace it with melted butter; also dairy-free butter works.
- Cinnamon: A teaspoon cinnamon is an essential spice for crafting a delicious homemade apple bread. While ground cinnamon is highly convenient, you can also grate cinnamon sticks for a more distinct flavor.
- Vanilla extract: Combining vanilla with cinnamon enriches every slice of this healthy dessert bread with warm and spicy flavors.
- Salt: A pinch of salt will enhance both taste and aroma while balancing the sweetness level.
Which are the best apples for bread?
The best apple varieties for bread-making are Honeycrisps, Granny Smith, Fuji, and Gala. Although they are all great, your choice will change the result in terms on both taste and texture. I personally prefer sweeter options such as Honeycrisp. But ultimately the final choice hinges on your individual taste preferences.
- Honeycrisps: My favorite variety, Honeycrisp apples boast a delightful blend of sweetness, juiciness, and a satisfying crunch, making them an excellent pair with cinnamon.
- Granny Smith: Another recommended apple variety is Granny Smith. Many people like them because they have a tangy, crisp flavor and keep their texture when baked.
- Fuji: Just like Honeycrisp, Fuji apples offer a sweet and juicy profile that perfectly matches cinnamon.
- Gala: If you desire tender apple bits, Gala apples are the way to go. They tend to soften more during baking and feature a sweet fragrance.
Recipe variations
Here are some creative twists you can give to this recipe to add your own touch and whip up the best apple bread ever. Feel free to experiment and use my ideas to create your own version.
- Nutty apple bread: Mix in the batter chopped nuts such as walnuts, pecans, or almonds for a delightful crunch and extra nutrients.
- Apple zucchini bread: Include grated zucchini along with the apples to increase moisture and fiber content. Zucchini will add extra nutrients and volume without altering the flavor.
- Spiced apple bread: Enhance the taste profile by including warm spices like nutmeg, cloves, or allspice. Together with cinnamon, they will allow you to make the most delicious dessert bread ever.
- Apple carrot bread: Add some grated carrots for more nutrients, texture and taste.
- Apple banana bread: Replace applesauce with mashed ripe bananas and give the classic banana bread recipe a twist . Bananas will add a great aroma and natural sweetness without excessive amounts of sugar.
- Apple chocolate chip bread: If you have the sweet tooth, stir in a handful of your favorite chocolate chips. I recommend dark chocolate chips, they are healthier and so indulgent!
How to make apple bread healthy
- Prepare for baking. Heat oven to 180°C (350°F) and fold a 20 cm (7.9 inches) loaf pan with parchment paper or grease with oil. In the meantime, peel and with the help of a knife cut the apples into small pieces.
- Mix wet ingredients. In a large bowl, combine applesauce with eggs, maple syrup, oil and vanilla extract. Once combined, whisk in the cinnamon and mix until smooth.
- Add dry ingredients. Using a rubber spatula or fork, stir in the flour, the baking soda and the salt. Mix wet and dry ingredients together until you get a smooth batter. Finally, incorporate the apples that you just cut into small bits.
- Bake and let cool. Pour the batter into your prepared loaf pan. Bake in hot oven for 35 to 40 minutes, or until a toothpick inserted into the center of your loaf comes out clean. Let cool over a baking rack or dish before slicing.
Storage instructions
Homemade apple bread is a versatile dish, whether you plan to eat it right away or prepare it for the week. To preserve freshness and taste, follow these simple storage directions.
- At room temperature. Let cool completely and then transfer to an airtight food container. At room temperature, this healthy breakfast bread maintains its freshness for up to 3 days.
- In the fridge. For a longer preservation, let cool, place it in a food container and refrigerate for a maximum of 4 days.
- In the freezer. This apple cinnamon bread freezes well. Slice and wrap in zipper bags; in the freezer, it will last for as long as 3 months. When you want to serve it, thaw and reheat in hot oven until soft and fluffy.
Tips for the best apple bread
- Use the apple variety that most matches your preferences. My recommendations are Honeycrisps, Granny Smith, Fuji, and Gala.
- Stick to natural, unsweetened applesauce without added spices or preservatives. Besides ensuring a healthier outcome, this will also enhance flavors and textures.
- Never overmix the batter, as excessive mixing can result in a dry and tough texture. Stir all ingredients just until they’re combined with no lumps.
- Pay attention to the baking time. Your apple breakfast bread is done when a toothpick inserted into its center comes out clean. Overbaking tends to make it dry and dense.
- Allow your cinnamon apple bread to cool before eating. Right after baking, the dessert is going to be too hot for you to experience all the good flavors.
FAQ – Frequently asked questions
If you follow a vegan diet, replace the two eggs with flaxseed eggs or other plant based alternatives.
Replace wholewheat flour with gluten-free pastry flour or certified gluten-free oat flour. Besides this, make sure that all other ingredients do not contain any gluten.
For a high protein breakfast bread, replace 30 grams (about 1/4 cup) of the flour with a scoop of protein powder. Although any type will work, I strongly suggest vegan protein powder or casein. Unlike whey, these are perfect for baking because they do not dry out when heated.
Of course it does! This recipe is great for breads, cakes and especially muffins. As simple as that, instead of a loaf pan pour the batter into muffin liners. Also, you will need to reduce baking time to about 20 to 25 minutes. Make sure you check out my healthy apple muffin recipe for more details!
More healthy dessert bread recipes
- Healthy oatmeal banana bread
- Protein banana bread
- Chocolate chip pumpkin bread
- Strawberry banana bread
- Low calorie banana bread
- Chocolate zucchini loaf
- Keto banana bread

Healthy Apple Bread
Ingredients
- 2 apples cored and diced
Dry Ingredients
- 220 grams (1 ¾ cup) white whole wheat flour or all purpose flour
- 1 tsp baking soda or 2 tsp baking powder
- ¼ tsp salt
- 1 tsp ground cinnamon
Wet Ingredients
- 2 large eggs
- 180 grams (¾ cup) applesauce unsweetened
- 80 ml (¼ cup) maple syrup or honey
- 45 ml (3 tbsp) canola oil or vegetable oil of choice
- 1 tsp vanilla extract
Instructions
- Heat oven to 180°C (350°F) and fold a 20 cm (7.9 inches) loaf pan with parchment paper or grease with oil.
- Peel and with the help of a knife cut the apples into small pieces.
- In a large bowl, combine applesauce with eggs, maple syrup, oil and vanilla extract. Once combined, whisk in ground cinnamon and mix until smooth.
- Using a rubber spatula or fork, stir in the flour, baking soda and salt. Mix wet and dry ingredients together until you get a smooth batter.
- Fold in the peeled apples, cut into small chunks.
- Pour the batter into your prepared loaf pan. Bake in hot oven for 35 to 40 minutes, or until a toothpick inserted into the center of your apple bread comes out clean. Let cool over a baking rack or dish before slicing.
Nutrition
The post Healthy Apple Bread Recipe appeared first on MattsfitChef.
]]>The post No Bake Protein Cookies appeared first on MattsfitChef.
]]>
Whenever I say that I have dessert every day, people ask me how I can still be in shape. My answer is quite simple. First thing first, I allow myself to eat a bit of everything in moderation. Over the year I came to let go of food restrictions, and this keeps me from overeating on “forbidden foods”. Second secret is making my own healthy desserts at home, with wholesome ingredients and better macros.
It is when entering the second argument that most people turn their heel and say goodbye. “Dear Matteo, I wish I could bake my own healthy stuff at home. But I have neither time nor desire. I’d rather go without or buy food from the store”.
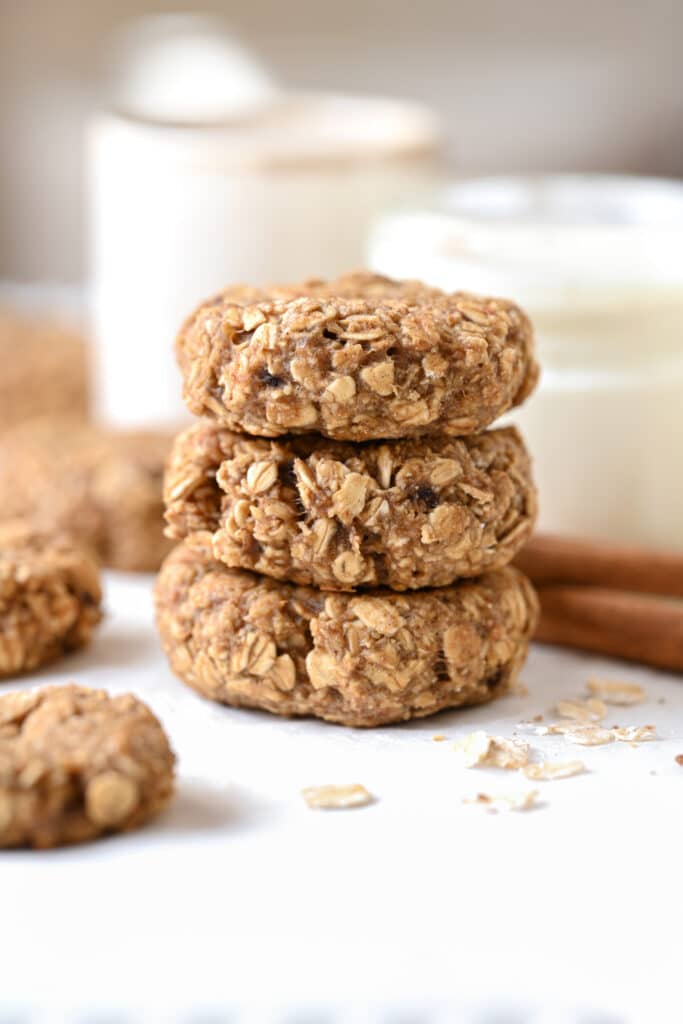
If this describes you, I may have something for you. Something sweet and tasty. My easy protein cookie recipe! Follow the instructions in this blog post and in a matter of minutes you’ll get a batch of cookies ready to enjoy. No need for baking. The best part? They are vegan, gluten-free, healthy, packed with protein and so delicious!
The ingredients for no bake protein cookies
- Rolled oats. For the best taste and texture I recommend rolled oats (also known as “old-fashioned” oats). Quick oats are also suitable but they tend to give cookies a soft and kind of mushy texture. If it is necessary, chose certified gluten-free oats.
- Protein powder. Use your favorite protein powder; this recipe can be prepared with either whey, casein or plant based protein powder (read further for more details). In terms of flavor, I recommend vanilla, chocolate or unflavored protein powder.
- Nut butter. The nut butter will help your dough get smooth and stick together without the need for eggs. You can use any nut butter you want – peanut, almond, cashew or hazelnut butter, they will all work. For nut free cookies, replace with tahini or sunflower seed butter.
- Maple syrup. This is by far my favorite option when it comes to making healthy recipes. You are free to replace with any other liquid sweetener, such as honey, agave syrup, date syrup or sugar-free maple syrup. But remember, these no bake protein oatmeal cookies can only be made with liquid sweetener, granulated sugars do not work.
Optional mix-ins
I can proudly say I am a “boring” person and I like my cookies to be simple. Oats, protein powder, nut butter and nada más. But maybe you are looking for something more exciting. If it is the case, this recipe is for you. From chocolate chips to crunchy walnuts, the ways how you can customize your no bake cookies with protein powder are endless. And if you still need inspiration, here are some ideas for you.
- Chocolate chips: Dark chocolate chips, semisweet chocolate chips, milk chocolate chips or sugar-free chocolate chips.
- Nuts: Crushed walnuts, pecans, almonds, cashews, hazelnuts.
- Seeds: Pumpkin seeds, sunflower seeds, flaxseeds, poppy seeds.
- Dried fruits: Raisins, cranberries, dried berries, dried apple.
- Fresh fruit: Blueberries, raspberries, a mix of fresh berries, apple chunks, diced pear, pieces of mango.
- Flavors and spices: Ground cinnamon, vanilla extract, nutmeg, cocoa powder.
Which protein powder for cookies?
These no bake protein oatmeal cookies can be prepared with vegan protein powder, casein or whey. Nevertheless, your choice may require adaptations because different types of protein powder show different characteristics. What you should know for this recipe is that:
- Vegan protein powder and casein absorb plenty of moisture. You will probably need to mix in a drop of extra milk, until the dough gets soft and smooth.
- Whey protein powder dissolves easily. If it is necessary, fix the dough with additional rolled oats until it reaches a good consistency. It should be neither too wet nor too thick.

Keto no bake protein cookies
If you follow a low carb diet, keep on reading because I have great news for you. Making no bake protein cookies keto is very simple. Follow the same recipe down here, but replace rolled oats with almond flour or hazelnut flour. Differently from oats, they are poor in carbs and will allow you to whip up a batch of cookies for your diet. Additionally, you will want to substitute maple syrup with sugar-free syrups that won’t add extra carbs.
Low calorie protein cookies
Are you looking for low calorie snack ideas? Then look no further and read this. Making low calorie cookies with protein powder is very simple. All you should do is following the two tips which you’re going to find down here.
- Replace nut butter with powdered peanut butter. Mix the powder with little water until smooth, then use it to prepare the dough.
- Sweetens with sugar-free syrups such as zero maple syrup or honey. Not only you will cut sugars, but also the amount of calories that each cookie provides.
How to make no bake protein cookies
Step 1: Prepare the dough. In a large bowl, start by combining rolled oats with protein powder, maple syrup and nut butter. Stir well until you get a soft mixture, first with a fork and then using your hands. If it is necessary, adjust with more oats or with a drop of milk. This depends on the protein powder that you are using.
Step 2: Make the cookies. Shape the cookies and place over a baking tray or plate lined with parchment paper. Finally, refrigerate for at least 30 minutes before serving.
Recipe variations
- Chocolate chip protein cookies. Stir in a handful of chocolate chips. For less sugar and more benefits I recommend dark chocolate, but also milk or semi-sweet chocolate chips will work great. Use sugar-free options if preferred.
- Protein cookies with nuts and seeds. Add a crunchy touch by mixing in pieces of walnuts, pecans, almonds, pumpkin seeds or a mix of those.
- Dark chocolate protein cookies. Replace 30 grams (1/3 cup) of the oats with cocoa powder, mix in extra chocolate chips and enjoy. Also, I recommend using chocolate protein powder.
- White chocolate protein cookies. As simple as this, enrich the taste experience with the addition of some good white chocolate chips. On top of sugar-free white chocolate, I like white chocolate protein powder.
- Protein oatmeal raisin cookies. A reinterpretation of the classic, make your no bake protein cookies with additional raisins, nuts and seeds if you want.
- Peanut butter protein cookies. Just make sure to use peanut butter as the nut butter of your choice and you’re set to go!
Tips for the best no bake protein powder cookies
You think you have learnt everything about these no-bake protein oat cookies. This recipe has no secret, right? Wrong! Here are a couple of extra tips to make the BEST protein cookies ever.
- Make these no-bake cookies with vanilla, chocolate or unflavored protein powder. These are simple flavors that won’t spoil the taste profile.
- Do not replace rolled oats with quick oats. While rolled oats give the cookies a great texture, quick oats will make them soggy.
- Opt for smooth and creamy nut butter. If the nut butter is too thick, you will have a hard time mixing the dough. Chef recommendation: choose almond butter!
- Customize your fitness cookies with extra chocolate chips, chopped nuts, seeds, raisins or dried cranberries.
- Allow the cookies to rest in the fridge for at least half an hour before eating. This way they will get the perfect taste and texture.

Storage information
After preparing, place your no bake cookies in a food container and refrigerate. In the fridge, they will last for up to four days. For a longer storage you can wrap them in sealable zipper bags and freeze for as long as three months.
FAQ – Frequently asked questions
If it is dry crumbly, adjust the dough with a drop of milk or additional nut butter until it gets smooth. The main reason why this may happen is the choice of protein powder.
Fix sticky dough with additional rolled oats until it reaches a smooth consistency. This is a common issue when using whey protein powder.
Although this recipe works best with protein powder, you can also make it without. Replace protein powder with almond flour or oat flour and adjust with more nut butter or more almond flour to consistency. Of course, the nutritional values will be completely different.
Yes, you can (but I don’t recommend it). After making the dough, line over a parchment paper covered baking tray and bake in hot oven at 170°C (340°F) for about 8 to 10 minutes.

More high protein snacks and desserts
- No bake protein balls
- Cookie dough protein bars
- Protein frozen dessert
- Low calorie protein brownies
- Chocolate protein muffins
- Chocolate protein balls
- Moist protein banana bread
- Pumpkin protein muffins
- Fudgy flourless protein brownies

No Bake Protein Cookies
Ingredients
- 70 grams (¾ cup) rolled oats
- 70 grams (¾ cup) protein powder see notes*
- 120 grams (½ cup) nut butter peanut butter, almond butter or cashew butter
- 80 grams (⅓ cup) maple syrup or honey
Instructions
- In a large mixing bowl, combine rolled oats with protein powder, maple syrup and nut butter. Stir well until you get a soft dough, first with a fork and then using your hands. If it is necessary, adjust the dough with more oats or with a drop of milk (this depends on the protein powder used, see notes*).
- Shape the cookies and place over a baking tray or plate lined with parchment paper.
- Refrigerate for at least 30 minutes before serving.
Notes
- Vegan protein powder and casein absorb plenty of moisture. You will probably need to mix in a drop of extra milk.
- Whey protein powder dissolves easily. If necessary, fix the dough with additional rolled oats until it reaches the desired consistency.
Nutrition
The post No Bake Protein Cookies appeared first on MattsfitChef.
]]>The post Protein Bread Recipe appeared first on MattsfitChef.
]]>
I have one question for you. If someone asks you what’s your favorite source of carbs, what would you choose between pasta, rice and bread?
Well, at least for me bread comes first. If we don’t consider oats of course, nothing will ever replace my protein #OatsForBreakfast ;). As a heavy consumer of baked goods, I decided it was high time I balanced my macros by making my own protein buns. With no yeast, it’s the perfect option for all those who are seeking a quick and easy protein bread recipe for their meals! I love it, and you will love it too!
Why you should make protein bread at home?
- It’s healthy and high protein, but without protein powder. Maybe you don’t have the best protein powder for baking or maybe you don’t have any at all, with this recipe you should not to worry. Here Greek yogurt is going to be our source of protein!
- It’s quick and easy to make. This protein bread is whipped up in under 15 minutes, baking time included. With no need for rising or kneading, it is definitely the best recipe if you don’t want to spend the entire day in the kitchen.
- You only need 3 ingredients. Made with Greek yogurt, flour and baking powder, homemade protein bread can’t get any easier. No yeast, no protein powder and no special flour!
- It’s soft and infallibly delicious. Soft, fluffy and so tasty, you will never believe that this is a protein bread with no yeast. Bakery style stuff, but homemade and macro-friendly.
- It’s a versatile food for any occasion. Whether for sandwiches or as a side for chicken breast, these Greek yogurt bread buns will fit all your needs.
3 Ingredient protein bread
- Flour: I like white whole wheat flour because it’s very similar to all purpose flour but less processed and more nutritious. Other great options are all purpose flour and spelt flour. Unfortunately this recipe does not work with oat flour or almond flour.
- Greek yogurt: This recipe requires thick Greek yogurt, either nonfat or full-fat. In general, full-fat options come with more calories but a much richer taste than nonfat products.
- Baking powder: As this is a protein bread with no yeast, the baking powder will help the dough rise while baking.
Choosing the best yogurt
The yogurt choice is key behind great protein bread without yeast. It is important that you don’t confuse Greek yogurt with Greek style yogurt. The main difference between the two is that the former has a firm, thick texture whereas the second is more runny. And as this recipe requires a thick product, be sure opt for Greek yogurt. Any other option would change – and ruin – the dough consistency.
Diary-free protein bread
Replace Greek yogurt with a plant based alternative of your choice, making sure to choose a dairy-free yogurt from a thick consistency. If you make this recipe with a liquid (“runny”) yogurt, the dough will get pretty sticky and hard to handle.

How to make protein bread at home
Prepare the protein dough. In a large bowl combine flour with baking powder, Greek yogurt, and optionally salt and olive oil. Quickly stir until it comes to form a dough, adding more flour if it is sticky or more Greek yogurt if it is too dry.
Transfer the Greek yogurt dough over a clean floured surface and knead to form a soft ball. Divide the dough into 4 equal size pieces. One at a time, shape each ball into a bun and sprinkle with your favorite toppings if desired.
Transfer to a parchment paper-lined baking sheet and bake in hot oven for 10 to 15 minutes, or until the top is golden brown. Let cool for a about 15 minutes before eating and enjoy!
Recipe variations
With just 3 ingredients, the base recipe for protein bread is quite simple. This means it can easily be adjusted to your likings. From pumpkin seeds to cheese or raisins, there is an option for everyone. And if you still need ideas, here are some tasty ways to make protein bread with Greek yogurt.
- Pumpkin seeds: Add pumpkin seeds into the batter and on top for a crunchy experience.
- Sunflower seeds: Same as before, but this time with sunflower seeds.
- Walnuts or pecans: Stir a handful of chopped walnuts or pecans into the dough for the crunch.
- Cheese: If you are looking for something more flavorful, try mixing in some shredded cheese. Great options are cheddar cheese, shredded mozzarella, feta cheese or low-fat cheeses.
- Chorizo or bacon: Have you ever thought of making bread with small chunks of chorizo inside? Trust me, you’ll get hooked at first bite.
- Cinnamon and raisins: Give a sweet twist to the recipe by including half a teaspoon of ground cinnamon and some raisins.
How to eat homemade protein bread?
As I mentioned before, these Greek yogurt buns are incredibly versatile. You can eat them just like normal bread, but with all the benefits of protein. Maybe you don’t need any, but in case let me give you a couple of ideas on how to serve these buns.
- Protein sandwich. Make a healthy lunch or snack by stuffing your buns with ham, grilled chicken or tofu, sliced cheese, avocado, leaves of lettuce and tomatoes.
- Side dish. The combination of Greek yogurt and flour makes this bread a great alternative to all-carb buns. You can eat it with chicken breast, fish filets or tofu if you follow a plant based lifestyle. Oh, and don’t forget your vegetables!
- Protein burger buns. In the mood for fast food? Slice your bread then stuff it with a juicy burger, low fat cheese, lettuce and sliced tomatoes. The best homemade protein burger buns ever!
- Breakfast toast. If you are into savory breakfasts, enjoy alongside scrambled eggs and avocado. Or why not, make avocado toast with poached egg on top!
- Peanut butter banana toast: Spread peanut butter (or any nut butter of your choice) over the bread and top if off with sliced banana. A great classic that anyone will love!
- Protein bruschetta. In the mood for something fresh? Enjoy with a drizzle of olive oil, minced garlic and diced tomatoes on top. And why not including mozzarella or cottage cheese for a pizza-like experience?!
- Protein French toast. Turn your Greek yogurt bread into French toast by dipping it in a mixture of beaten egg, cinnamon, and vanilla extract. Cook on a skillet until golden brown and serve with your favorite fruit. I recommend fresh berries and sliced banana!
Storage information
Homemade protein bread can be served warm or stored for later. To best preserve a soft texture, place in an airtight container or in zipper bags. At room temperature, it will last for up to 24 hours. In the fridge, it will keep fresh for a maximum of 3 days. As an option, you can also wrap each buns individually, place in a zipper bag and freeze for up to 3 months. Thaw and reheat in the oven before serving.

More from my protein bakery
- Greek yogurt pizza
- Easy protein pizza
- Zucchini pizza crust
- 2 ingredient Greek yogurt bagels
- Protein oatmeal banana bread
- Greek yogurt protein cookies
- Chocolate protein cake

Protein Bread Recipe
Ingredients
- 200 grams (1 ½ cup) whole-wheat flour or all purpose flour
- 1 ½ tsp baking powder
- 200 grams (⅔ cup) Greek yogurt
Optional Ingredients
- salt to taste
- ½ tbsp olive oil
Instructions
- Preheat oven to 180ºC (350ºF).
- In a large bowl combine flour with baking powder, Greek yogurt, and optionally salt and olive oil.Quickly stir until it comes to form a dough (add more flour if it is sticky or more Greek yogurt if the dough is too dry).
- Transfer the protein dough over a clean floured surface and knead to form a soft ball. Divide the dough into 4 equal-size pieces.
- One at a time, shape each ball into a bun and sprinkle with your favorite seeds if desired.
- Transfer to a parchment paper-lined baking sheet.
- Bake in hot oven for 10 to 15 minutes, or until the top is golden brown.
Nutrition
The post Protein Bread Recipe appeared first on MattsfitChef.
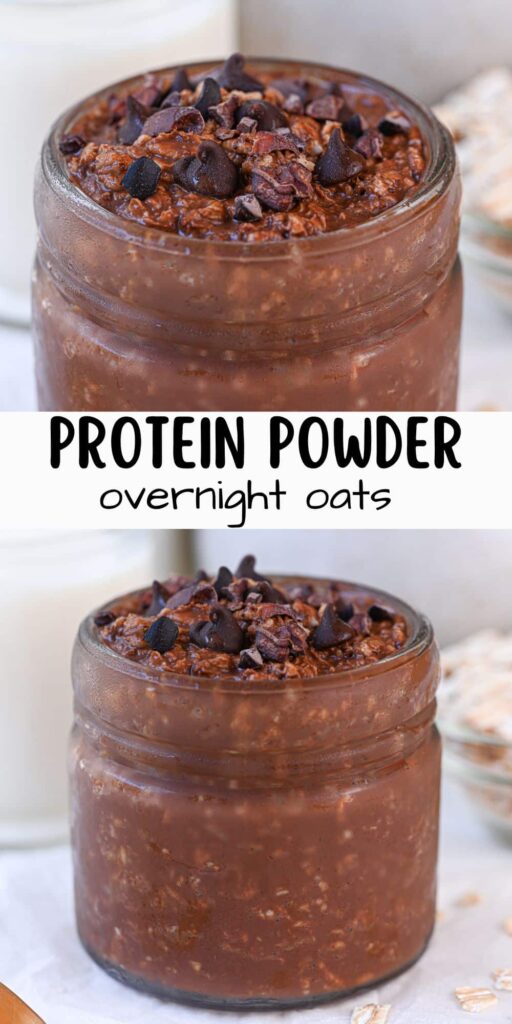
]]>The post Protein Overnight Oats appeared first on MattsfitChef.
]]>
Quick protein breakfast for busy days
Imagine it’s Monday morning. The first of a week full of busy mornings with too many things to do and too little time. You just woke up and now you must get ready for the day. But you’re also hungry, too hungry to wait until lunchtime. What would you have for breakfast? A sugary bowl of cereals? Or maybe just an apple and get “hangry” after 5 minutes.
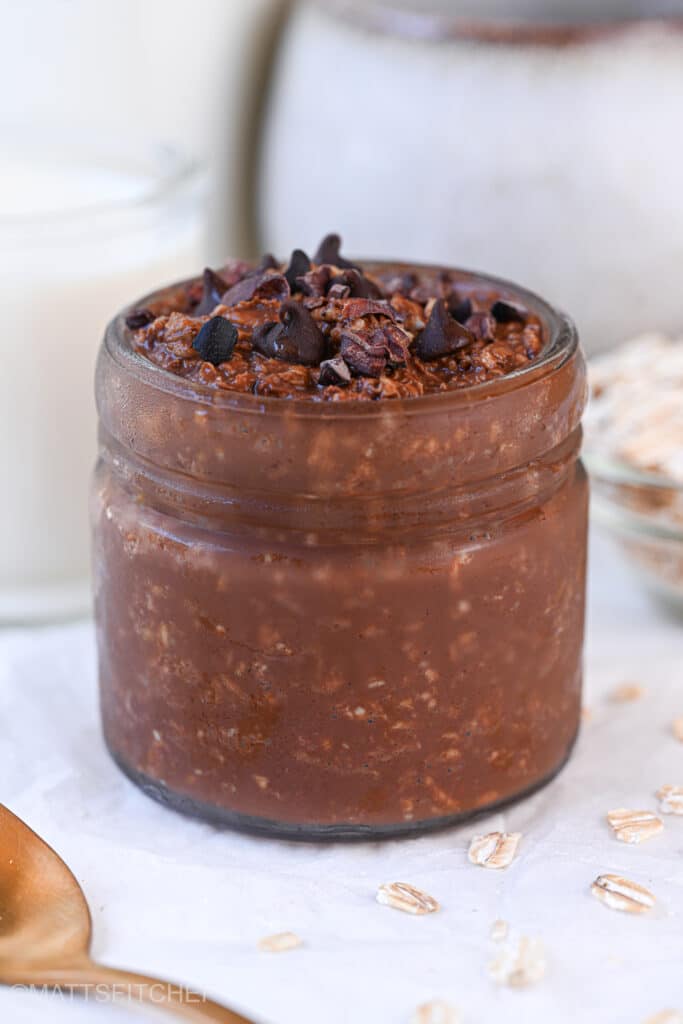
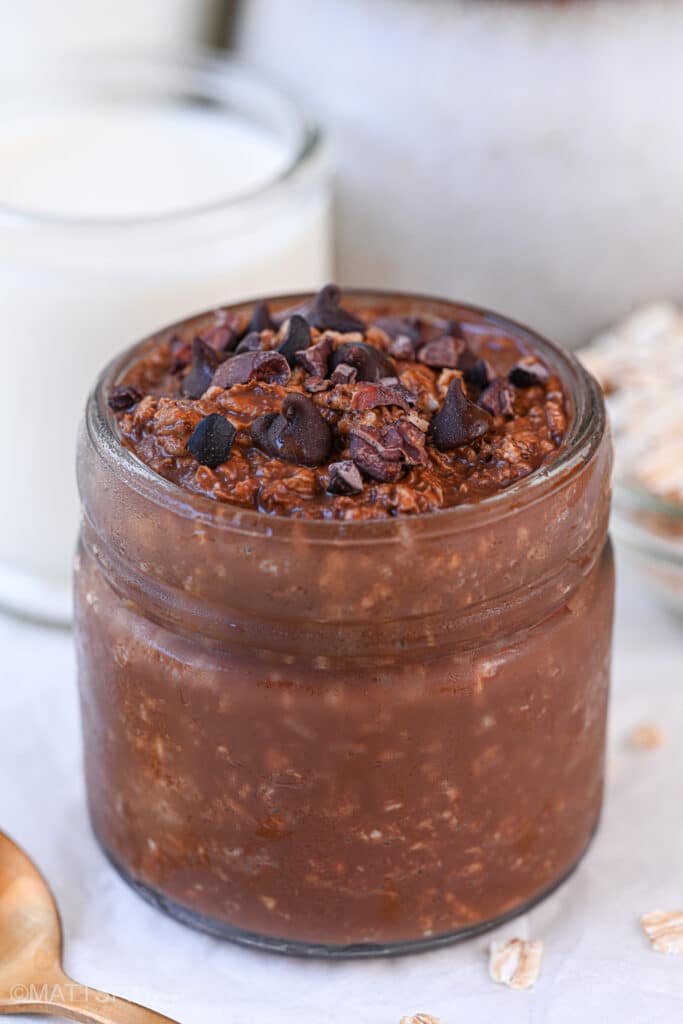
Well, I may have something for you. These protein overnight oats are the healthy solution to your busy schedule. Made overnight with protein powder, these delicious oats are a simple breakfast that has it all: quick, easy, healthy and incredibly delicious! Believe me, with this recipe you will feel satisfied until lunchtime. Time to leave sleepy and sluggish mornings behind!
The ingredients for protein overnight oats
Differently from what you may think, making a quick healthy breakfast is incredibly simple. The simplicity of this meal starts right from its ingredients. From oats to protein powder, here is all you need to make simple protein oats overnight!
- Rolled oats: These are the best type of oats for the recipe, but you can also use quick oats. Steel cut oats, instead, do not work.
- Protein powder: This recipe uses chocolate whey protein powder, but you are free to choose any protein powder you like (vegan, whey or casein; flavored or unflavored). Bear in mind that based on the choice, you may need to adjust with additional milk if the oats get too thick.
- Maple syrup: To sweeten protein overnight oats naturally, I normally use maple syrup. As an alternative, you can opt for honey, agave syrup, date syrup, coconut sugar or any granular sweetener of your choice. Also calorie-free options such as erythritol work.
- Milk of choice: Use your favorite options, dairy or dairy-free milk are all great. For oats that are yet higher in protein, I recommend semi-skimmed cow milk or soy milk.
- Pinch of salt: This balances sweetness and brings out all the delicious flavors.
6 protein overnight oatmeal flavors
- Chocolate. Stir in 1 tablespoon of cocoa powder plus some chocolate chips or cocoa nibs if you desire.
- Banana bread. Mash in half ripe banana and include 2 teaspoons of your favorite nut butter, a hint of cinnamon and vanilla extract.
- Apple cinnamon. Mix in a handful of apple chunks, 1/3 teaspoon of ground cinnamon and a hint of vanilla extract.
- PB&J. Add 1 tablespoon of peanut butter a 1 tablespoon of jam (I recommend sugar-free strawberry jam).
- Banana and peanut butter. Stir in half mashed banana, 1 tablespoon of peanut butter and serve with more sliced banana on top.
- Blueberry lemon. Stir in a handful of fresh blueberries plus a teaspoon of lemon and a sprinkle of lemon zest if you desire.
Topping ideas
Once ready, you can enjoy your protein powder overnight oats with additional toppings such as pieces of fruit, peanut butter, nuts and seeds. For my chocolate protein oats I used a combination of chocolate chips and cocoa nibs, plus sliced banana before eating. Other great topping ideas are:
- A mix of fresh berries such as blueberries, raspberries and strawberries.
- Fresh fruit like apple, pear, banana, mango or kiwi.
- A drizzle of your favorite nut butter, such as peanut butter, almond butter or cashew butter.
- Pieces of walnuts, pecans, almonds or your favorite nuts.
- Crunchy seeds such as pumpkin seeds, sunflower seeds, flaxseeds or chia seeds.
- A dollop of Greek yogurt or plant based alternatives like coconut yogurt or soy yogurt.
- Extras such as chocolate chips, cocoa nibs, desiccated coconut, raisins.
The best protein powder for overnight oats
You can make these overnight oats with vegan protein powder, whey or casein. Pick and choose the one you prefer.
However, you should keep in mind that your protein powder choice may affect the oatmeal texture. While vegan protein powders and casein are more absorbent, whey dissolves quite easily. This means that the first two options will require more milk than whey. So, when preparing the porridge, add a drop of milk more if you notice that the mixture gets too thick. Conversely, overnight oats with whey protein powder may turn out a bit too liquid for you. If this is the case, fix the texture with more oats.
With respect to the flavor, you are free to opt for the one you like the most. My advice, however, is to make overnight oats with protein powder from a simple flavor, such as vanilla or chocolate. Other options may taste too artificial and spoil the taste of your breakfast.
How to make overnight oats with protein powder
In a medium bowl or mason jar, mix all the ingredients together – rolled oats, protein powder, maple syrup, a pinch of salt and any additional ingredient you want. Pour in the milk and mix until all ingredients are well combined. Beware that depending on the protein powder used, the overnight oats may require more or less milk. As a rule of thumb, vegan protein powders and casein require more liquid than whey does.
Once everything is combined, transfer to a jar or sealable bowl and refrigerate overnight or for a maximum of 4 days. You can serve the oatmeal as it is or with additional toppings such as fresh fruit and nut butter. Toppings are completely optional, but they will take your breakfast to the next level!
Recipe tips: How to store protein overnight oats
Here are a few tips on how to best store protein powder overnight oats to preserve taste, texture and all the nutrients. Make sure you read carefully and you’ll be ready to meal prep breakfasts for the entire week.
- Use a proper container. Choose an airtight container or jar with a lid that seals tightly. Mason jars in glass are the best option for the purpose.
- Mix the base ingredients first. If meal prepping overnight oats, I suggest you mix just the basic ingredients (oats, protein powder, maple syrup, milk) first and leave all the extras for later.
- Store in the refrigerator. First of all, seal the container with an airtight lid to prevent the oats from going bad and odors from entering. Once sealed, place in the refrigerator and store for up to 3 to 4 days.
- Store for a maximum of 4 days. Although some people prepare overnight oats for the whole week, I strongly recommend consuming them maximum 4 days after making. On the fifth day, your oatmeal will start tasting and smell bad.
- Mix well before serving. When you’re ready to eat, give the oats a good stir to combine all ingredients and restore the original consistency. As the oats may have soaked some of the liquid, you may need to fix the texture with additional milk.
- Add toppings before serving. It’s best to add fruit, nut butter and toppings only before eating. This helps maintain their freshness, taste and crunchiness in case of nuts and seeds.
FAQ – Frequently asked questions
Choose certified gluten-free rolled oats and whey protein powder, casein or isolate vegan protein powder without grains (such as soy or pea protein).
Use vegan protein powder and plant based milk alternatives such as soy milk, unsweetened almond milk, oat milk or rice milk.
The base recipe for protein powder overnight oats is quite low in calories. What mostly influences the macros are additional ingredients such as nut butter or chocolate chips. If you are on a weight loss diet, try to be more conscious about your choices.
Protein overnight oats can be a convenient macro-friendly breakfast for weight gain and bulking. Just make sure to mix in plenty of nut butter, banana or some chopped dates and you’ll easily ramp up the calories.
Although I do not recommend it, overnight oats can be frozen for up to 1 month. When you’re ready to eat, remove from the freezer and put in the refrigerator the night before. Allow to thaw overnight and in the morning you can eat them cold or microwave for a warm option.
More protein breakfast recipes
- Protein powder stovetop oatmeal (the complete guide)
- Protein pancake recipe
- Casein protein oatmeal
- Apple protein baked oats
- High protein waffles
- No bake protein balls
- Oatmeal protein cookies
- Chocolate protein balls
- Protein oat bars

Protein Overnight Oats
Ingredients
Basic protein overnight oats recipe
- 40 grams (½ cup) rolled oats
- 30 grams (⅓ cup) protein powder see notes*
- ½ to 1 tbsp maple syrup or honey, to taste
- a pinch of salt
- 180 ml (¾ cup) milk of choice
Chocolate overnight oats
- 1 tbsp cocoa powder
- 1 tsp cocoa nibs or chocolate chips
Banana bread overnight oats
- ½ banana mashed
- 2 tsp nut butter
- ⅓ tsp ground cinnamon
- hint of vanilla extract
Blueberry lemon overnight oats
- 1 tsp lemon juice
- blueberries fresh or frozen
Peanut butter banana overnight oats
- ½ banana mashed
- 1 tbsp peanut butter
Apple cinnamon overnight oats
- ½ apple diced
- ⅓ tsp ground cinnamon
- a hint of vanilla extract
PB&J overnight oats
- 1 tbsp peanut butter
- 1 tbsp jam
Instructions
- In a medium bowl or mason jar, mix all the ingredients together – rolled oats, protein powder, maple syrup, a pinch of salt and any additional ingredient you prefer. Pour in the milk and mix until all ingredients are well combined. Depending on the protein powder used, the overnight oats may require more or less milk (see notes*).
- Transfer to a jar or bowl and refrigerate overnight or for a maximum of 4 days. Before serving, you can top with your favorite fruit, nut butter, Greek yogurt or any topping you like
Notes
- This recipe uses chocolate flavored whey protein powder. If you make protein overnight oats with casein or vegan protein powder, this recipe may require a couple tablespoons of milk more.
- Nutritional values are provided (as approximations) for the basic overnight oats recipe. Precise calories and macronutrients may vary depending on the oatmeal flavor you choose to prepare.
Nutrition
The post Protein Overnight Oats appeared first on MattsfitChef.
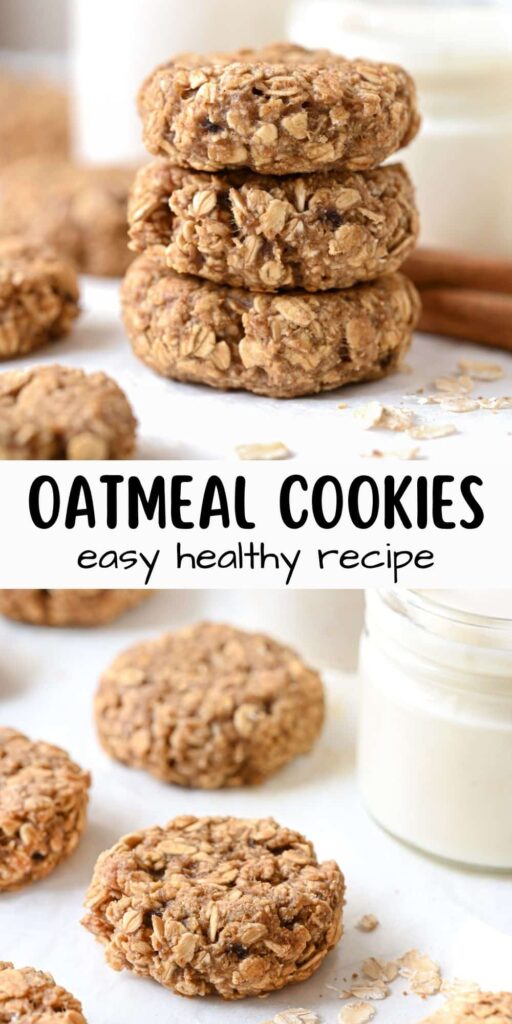
]]>The post Healthy Oatmeal Cookies appeared first on MattsfitChef.
]]>
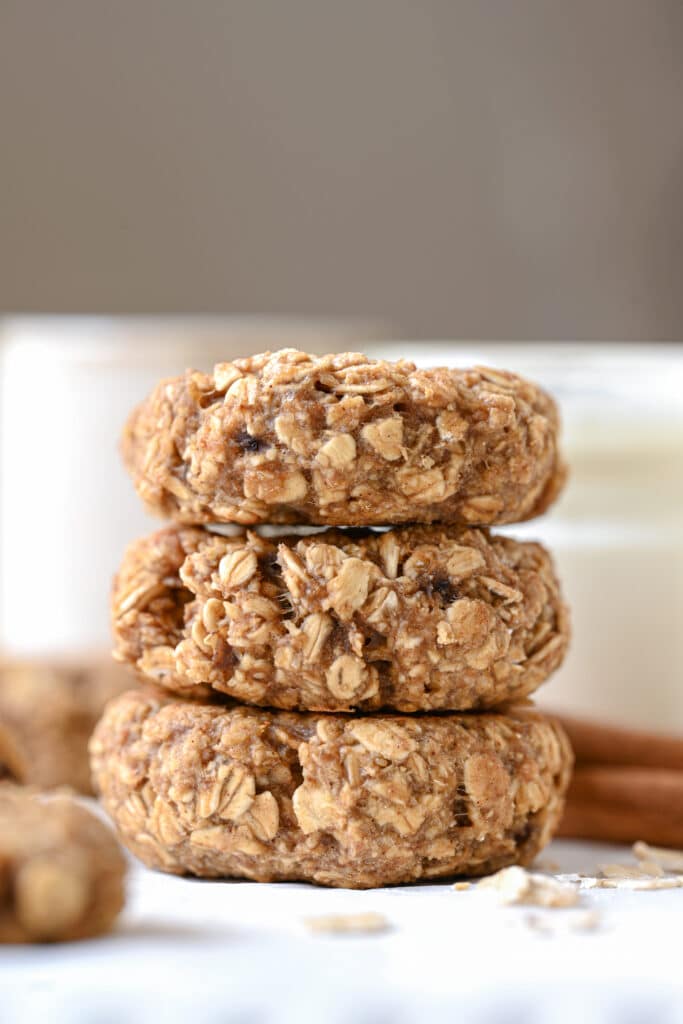
Whether you prefer gooey chocolate chips or raisins, there are many ways how people like their cookies. But…do we all agree that oatmeal cookies are THE BEST? No matter what you put inside, I firmly believe that nothing will ever beat some good homemade oat cookies. Those which are soft at first bite and chewy, with all the taste and flavors.
Oatmeal raisin cookies, pumpkin cookies, protein cookies. Last day I was surfing through my website when I realized that I have many cookies here. But yet, I had never posted a simple oatmeal cookie recipe that is healthy and versatile, so that you can adapt it to your likings and preferences. Hence, I quickly set out baking and here I am!
Why these are the best oatmeal cookies
- Healthy and nutritious. This recipe only uses wholesome ingredients like oats and nut butter, which provide plenty of nutrients such as fibers and vitamins. No oil, no refined flour and no refined sugar.
- Soft, chewy and delicious. Each cookie is an explosion of taste and texture. Soft and chewy, with lots of delicious flavors.
- Quick and easy to make. These healthy oatmeal cookies are whipped up in a bowl in minutes, so that you won’t need to mess up the entire kitchen.
- Simple ingredients. Oats, maple syrup and egg…All you need is a handful of basic ingredients that you probably already have at home. Because eating healthy doesn’t have to be hard and expensive!
- Customizable and diet-friendly. With chocolate chips or walnuts, these simple oatmeal cookies can be customized to suit your own preferences and dietary needs. For instance, you can easily make them vegan, gluten-free or high protein.
- Practical and versatile. Homemade oatmeal cookies are the perfect grab-and-go snack to pack for school, work or when you’re out.
Ingredients for healthy oatmeal cookies
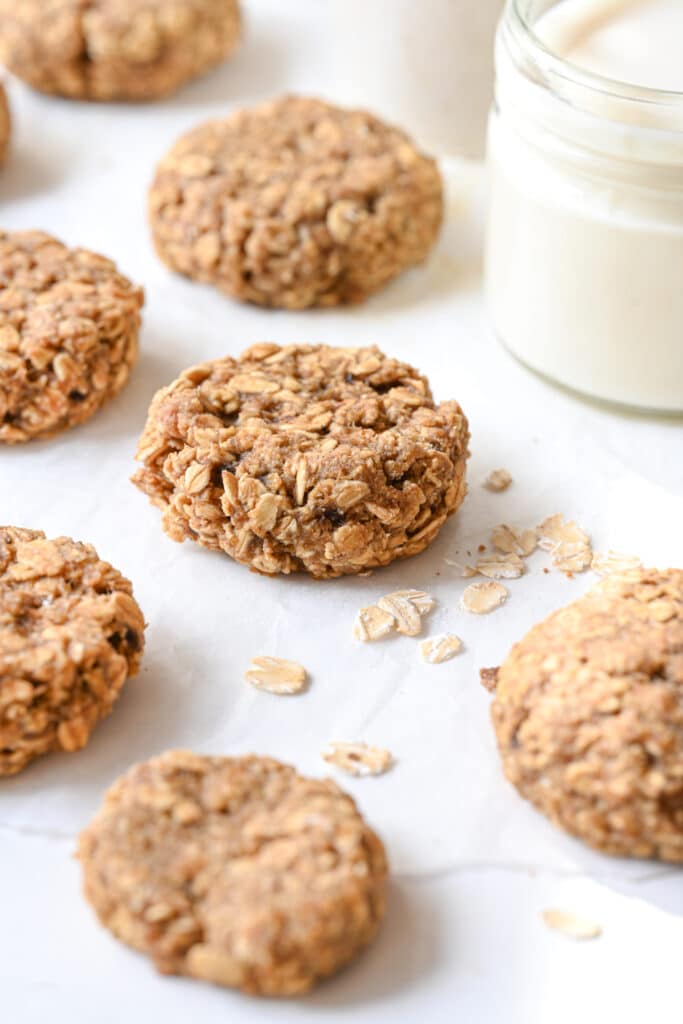
- Rolled oats: This recipe works best with rolled oats (sometimes called “old-fashioned oats”); it is less refined and provides the classic chewy texture of oatmeal cookies.
- Oat flour: Instead of white flour, this recipe uses oat flour. You can make it at home by grinding the oats into a fine powder or purchase it from the store.
- Egg: Use a large fresh egg, possibly from free-range chickens. This will make your cookies more flavorful and delicious.
- Applesauce: In this recipe, applesauce adds natural sweetness and moisture without the need for oil or butter. I recommend unsweetened applesauce, it will make healthier oat cookies.
- Maple syrup: Maple syrup is a wholesome and natural alternative to refined sugars and tastes delicious.
- Almond butter: Natural almond butter is my favorite choice because it gives these oatmeal cookies a great flavor and soft texture without tasting as strong as peanut butter. For the best result, choose creamy nut butter.
- Ground cinnamon, vanilla extract and salt: The combination of spices balances the sweetness level and improves flavors.
- Baking powder: Baking powder is the leavening agent that helps cookies get softer.

Replacement options
- You can replace rolled oats with quick oats, but the cookies will have a slightly softer texture. Because of their long cooking time, steel-cut oats do not work.
- If you don’t have oat flour, use almond flour, wholewheat flour, spelt flour or common all-purpose flour. For a healthier recipe, try to prefer wholegrain alternatives.
- Instead of egg you can use flaxseed egg, chia egg or any other vegan egg replacement.
- A great alternative to applesauce is mashed ripe banana. It will give these cookies plenty of moisture and sweetness, but with a slightly stronger aftertaste.
- Almond butter can be substituted with any creamy nut butter you like (peanut butter, cashew butter, hazelnut butter, etc.). For nut-free oat snacks you can use sunflower seed butter or tahini.
- The best replacements for maple syrup are honey, agave syrup, date syrup and coconut syrup. Unfortunately this recipe does not work with granulated sweeteners such as brown sugar, erythritol or stevia.
- In case you don’t have baking powder, use a hint of baking soda. Once again, make sure it is just a hint. Baking soda is stronger than baking powder and in excessive amounts it tends to ruin the taste of desserts.
Vegan oatmeal cookies
If you follow a vegan diet, make eggless oatmeal cookies by replacing the animal product with a plant based alternatives. My suggestions are flaxseed egg and chia egg, they are an all-natural solution to eggless baking.
How to make oatmeal cookies healthy
- Make healthy cookie dough with oats. In a large mixing bowl add egg, applesauce, almond butter, maple syrup, ground cinnamon, vanilla extract and a pinch of salt. With the help of a hand mixer or whisk, stir the mixture for a couple of minutes it gets smooth. Finally, add to the bowl rolled oats, oat flour, baking powder and give it a good stir. If you want, mix in now additional ingredients such as chocolate chips, walnuts or raisins.
- Let the dough rest and bake. Place the dough in the fridge and allow it to set for at least 15 minutes (ideally for 30 minutes to 1 hour). Scoop out about 1/3 cup of dough and shape 10 cookies, then transfer to a parchment paper covered baking sheet. Bake in hot oven at 180°C (360°F) for 10 to 12 minutes and let cool before serving.
Storage directions
After baking, line your oat cookies over a baking rack – or let in the tray – and allow to cool completely at room temperature. Once they have cooled, transfer to an airtight food container, making sure it is sealed with lid so that humidity doesn’t get in.
- At room temperature, they will last for up to 3 days.
- In the fridge, they will stay fresh for about 5 days.
- In the freezer, they will keep for 3 months. For the best storage, make sure you seal leftovers in zipping bags or in a freezer safe container. Before eating, reheat for a couple of minutes in the oven until warm and chewy again.
6 ways to make oat cookies healthy
- Chocolate chip oatmeal cookies. Add your favorite chocolate chips and no one will be able to resist these healthy cookies with oats. Chef recommendation: dark chocolate chips!
- Oatmeal raisin cookies. Stir in the dough a handful of tasty raisins and some seeds or walnuts if you desire.
- Banana bread oat cookies. Substitute applesauce with mashed banana, mix in some walnuts and don’t forget plenty of cinnamon!
- Oat cookies with nuts and seeds. Add a crunchy touch by stirring in pieces of walnuts, pecans, almonds, pumpkin seeds or a mix of those.
- Chocolate oat cookies. Replace half of the oat flour with cocoa powder, mix in extra chocolate chips and enjoy your chocolate treat!
- High protein cookies with oats. Replace the oat flour with your favorite protein powder and adjust the dough with extra nut butter or oats if it is necessary.
Serving ideas
- Breakfast. Side your oatmeal cookies with a bowl of Greek yogurt and fresh fruit for a delicious healthy breakfast.
- Grab-and-go snack. Pack some cookies and take them with you whenever you are outside. They are a great healthy snack for work, school and trips.
- Post workout snack. Enjoy alongside your favorite fruit and a protein shake to fuel your body after exercising.
- Dessert. On their own, with a glass of milk or with extra almond butter on top, these healthy cookies will satisfy your sweet tooth without guilt.
FAQ – Frequently asked questions
Choose certified gluten-free rolled oats and oat flour, and double-check that the baking powder does not contain traces of gluten.
Substitute oat flour with a protein powder of your choice (I recommend vegan protein powder and casein, not whey) or almond flour. If you realize that the dough gets too thick, smooth it out with extra nut butter. Should it get too wet instead, fix with more oats.
Or try my protein oatmeal recipe here!
In case of a nut allergy, choose sunflower seed butter or tahini. As an alternative, you can also swap it out for canola oil, melted coconut oil, avocado oil, vegetable oil or melted butter.
More oat cookie recipes
- Healthy oatmeal raisin cookies
- Healthy cookie dough bites with oats
- Oatmeal protein cookies
- 3 ingredient breakfast cookies
- 2 ingredient banana oatmeal cookies
- Blueberry oatmeal cookies
- Pumpkin oat cookies
- Banana bread cookies
- No bake chocolate cookies
Healthy Oatmeal Cookies
Ingredients
- 1 egg
- 60 grams (¼ cup) unsweetened applesauce or mashed banana
- 60 grams (¼ cup) almond butter or preferred nut butter
- 80 ml (¼ cup) maple syrup or honey
- 1 tsp ground cinnamon
- 1 tsp vanilla extract
- ⅙ tsp salt
- 150 grams (1 ½ cup) rolled oats
- 50 grams (½ cup) oat flour or all purpose flour
- 1 tsp baking powder
Optional Add-ins
- 50 grams (⅓ cup) walnuts or pecans, almonds, seeds
- 40 grams (¼ cup) chocolate chips
- raisins, cranberries
Instructions
- Preheat oven to 180°C (360°F) and line a baking sheet with parchment paper.
- In a large mixing bowl add egg, applesauce, almond butter, maple syrup, ground cinnamon, vanilla extract and salt. Using a hand mixer or whisk, stir the wet mixture for a couple of minutes until all is well combined.
- Add to the wet mixture rolled oats, oat flour and baking powder. Using a spatula stir all ingredients together.
- Optionally, mix in additional ingredients such as chocolate chips or walnuts.
- Let the dough rest in the fridge for at least 10 minutes.
- Scoop about 1/3 cup of dough out and shape 10 cookies. Transfer the raisin cookies to the parchment paper covered baking sheet, spacing them apart.
- Bake in hot oven for 10 to 12 minutes. Let cool over a baking rack before serving.
Notes
- At room temperature, they will last for up to 3 days.
- In the fridge, they will stay fresh for about 5 days.
- In the freezer, they will keep for 3 months. For the best storage, make sure you seal leftovers in zipping bags or in a freezer safe container.
Nutrition
The post Healthy Oatmeal Cookies appeared first on MattsfitChef.
]]>The post Oatmeal Banana Bread appeared first on MattsfitChef.
]]>
I love oatmeal. It’s been my favorite breakfast since 2017 and things don’t seem to change. Actually, the more the time passes the more my “love” grows. If in the past they were just for breakfast, now oats mean muffins, cookies, granola bars and of course…banana bread. Oatmeal banana bread, my favorite healthy dessert ever!
Why you should make banana bread with oats
If you’re looking for a healthy and delicious treat, oatmeal banana bread is all you need. This is my to-go recipe for whenever I have a bunch of ripe bananas lying around. Here at home we all love it, and I am pretty sure you will love it too. Still not convinced? Let me give you 5 simple reasons why you should make banana bread with oats.
- Oats are a high in dietary fiber, which helps the digestion and keeps you feeling full for longer. Further, they’re packed with vitamins, minerals and antioxidants that contribute to your overall health. Last but not least, oatmeal is great for gluten-free baking.
- This oatmeal banana bread recipe comes together in a blender in 5 minutes, without the need for mixing. So you won’t need to clean up bowls and equipment after making. Trust me, this is by far the easiest banana bread ever!
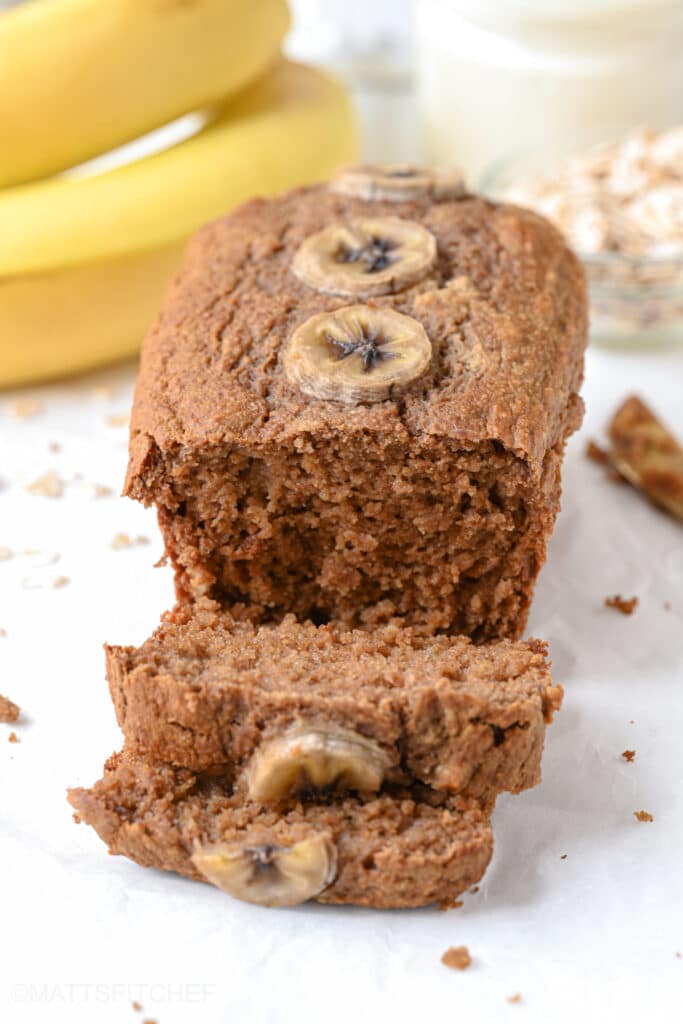
- The taste and texture of this loaf will get you hooked at first bite. It’s so rich and moist, with plenty of banana flavor and a cinnamony aftertaste. Believe me, you won’t even notice that there’s no oil nor flour here.
- Eating healthy doesn’t have to be expensive if you make banana bread with oatmeal. Ripe bananas and oats are two of the most budget friendly foods out there. Further, they are common household ingredients that you can get from any grocery store.
- What makes oatmeal banana bread a winner is its versatility. You can customize it to suit your taste and preferences. Whether you want it high protein or gluten-free, the possibilities are endless.
Ingredients and substitutes
- Ripe bananas: This recipe requires three ripe bananas, the ones with black spots all over their skin. Those are the best because they provide natural sweetness and make your loaf moister.
- Rolled oats: For this flourless banana bread you will need to blend rolled oats together with all other ingredients until the batter gets smooth. For the best taste and texture I recommend rolled oats, but you can also replace with quick oats. Instant oats are not recommended, and steel-cut oats are not suitable at all (read further for more details).
- Eggs: Use two large fresh eggs for extra moisture, flavor and texture. In this recipe, eggs also help bind the batter so that your loaf won’t fall apart after baking.
- Maple syrup: For a healthy banana oatmeal bread this recipe uses maple syrup. It is a wholesome and natural alternative to refined sugars and tastes delicious. Possible replacements are honey, agave syrup, date syrup and coconut syrup.
- Nut butter: I like almond butter, but feel free to use any nut butter you like. Creamy peanut butter, cashew butter, walnut butter or hazelnut butter are all great options. In case you have an allergy or intolerance to nuts, replace with sunflower seed butter or tahini.
- Baking powder: This ingredients helps the bread rise and get fluffier. You can replace with about 3/4 teaspoon baking soda, if preferred.
- Spices: A hint of vanilla extract coupled with cinnamon will give your loaf all the delicious flavors of homemade banana bread.
- Salt: A pinch of salt will balance flavors and sweetness while enhancing the taste. Use low-sodium salt if it is necessary.
Which oats for banana bread?
If you are familiar with oatmeal, you probably already know that there are many types of oats out there. Generally speaking, the most common are rolled oats, quick oats, instant oats and steel-cut oats. However, not all of them are equally good to make banana bread. In the following lines you will find the best picks for this recipe, proposed in order from best (place number 1) to worse (place number 3). As you will see, steel-cut oats are not in the list. The reason is that they must be cooked for about 30 minutes to 1 hours, and afterwards they are going to become similar to boiled rice.
- Old-fashioned rolled oats: These are the best option for banana oatmeal bread. They give the loaf a hearty texture and a nutty aftertaste.
- Quick-cooking oats: Quick oats are a more processed version of rolled oats that have been cut into smaller pieces, so they cook faster. They can also be used, but your banana bread will have a slightly softer texture.
- Instant oats: The last – and less suitable – option you have is instant oats. As they are more processed, I do not recommend them; they tend to give baked goods an excessively soft (almost sticky) texture.
Gluten-free oatmeal banana bread
A great thing about banana bread with oatmeal is that it can easily be made gluten-free. There’s no flour in this recipe. To ensure that the loaf matches your dietary needs, however, you will need to use certified gluten-free rolled oats. Not all products in the market are, so double check your oatmeal package.
The vegan version
Do you follow a vegan diet but want to make oatmeal banana bread? Well, I have good news for you. All you should do is replacing the two eggs with flaxseed eggs or chia seed eggs. For the flaxseed egg, combine one tablespoon of ground flaxseed with three tablespoons of water and allow to rest for about 5 minutes. Repeat for the second vegan egg and you can start with the batter.
Oatmeal banana bread with protein powder
For a high protein banana bread, replace 50 grams (1/2 cup) of the oats with protein powder. Although any type works, I recommend vegan protein powder or casein. Unlike whey, these are perfect for baking because they do not dry out.
Just keep in mind that substituting oats with protein powder will change the consistency of your batter. In general, plant based protein powder and casein absorb more liquid while whey less. Make sure you adjust the batter with an additional drop of milk or with more oats until it gets smooth, if it is necessary.

How to make oatmeal banana bread in a blender?
Prepare for baking. First of all, preheat your oven to 180°C (350°F) and fold a 20 cm (7.9 inches) loaf pan with parchment paper or grease with oil. Keep it aside, we will need this later.
Blend it up. Add all ingredients to a high speed blender or food processor and blend the batter until smooth. The oats should become flour. If you desire, stir in additional ingredients such as walnut chunks, pumpkin seeds or chocolate chips. But don’t bled again, just give it a mix using a fork or spatula.
Bake oat banana bread. Pour the batter into your prepared loaf pan. Bake in hot oven for 30 to 40 minutes, or until a toothpick inserted into the center of your oatmeal banana bread comes out clean. For a moist texture, do not overbake the loaf. Remove from the oven and let cool in the loaf pan for about 15 minutes. Finally, take it out of the mold and let cool completely before slicing
Storage directions
Before storing, let the banana loaf cool completely. Once cooled, place leftovers in an airtight food container and store at room temperature for up to 3 days.
For a longer storage I recommend refrigerating it; it will last for about 5 days. As before, keep it inside a sealable food container so that it won’t absorb humidity. You can also freeze in an airtight zipping bag for up to 3 months. Before serving, remove from the freezer and pop in the oven for a couple of minutes until nicely warm.
Dos and don’ts: Tips for best oatmeal banana bread
- DO 1: Use ripe bananas. The best bananas for banana bread are very ripe. The ones with dark spots all over their skin or even better the ones with a brown-ish skin. They will make your oat bread sweeter and moister.
- DO 2: Use the right oats. For the best taste and texture I highly recommend rolled oats, followed by quick oats. Try to avoid instant oatmeal, and don’t use steel-cut oats. They won’t work.
- DO 3: Include extra ingredients. Feel free to add more taste and texture with extra ingredients such as chocolate chips, chopped walnuts, pecans or a mix of seeds.
- DO 4: Enjoy on day two. Banana desserts taste better after they have been in the fridge overnight. All the good flavors come out and their texture becomes addictive.
- DON’T 1: Don’t overmix batter. Just blend all ingredients until the oats become flour and you get a smooth batter. Excessive blending may affect the texture of homemade banana oatmeal bread.
- DON’T 2: Don’t overbake the loaf. When baked for too long, it tends to gets hard and dry; your dessert is ready when a toothpick inserted into the center comes out clean.
More healthy recipes with bananas
- 3 ingredient baked oatmeal
- Banana bread cookies
- 2 ingredient banana oatmeal cookies
- Healthy chocolate banana bread
- Low calorie banana bread
- Keto banana bread
- Oatmeal chocolate chip bars
- Banana oatmeal muffins

Oatmeal Banana Bread
Ingredients
- 3 large bananas ripe
- 2 eggs
- 70 ml (¼ cup) maple syrup sub with honey
- 60 grams (¼ cup) nut butter peanut, almond, cashew butter (or sunflower seed butter)
- 200 grams (2 cups) rolled oats sub with quick oats
- 2 tsp baking powder
- 1 tsp vanilla extract
- ½ tsp ground cinnamon
- ⅙ tsp salt
Instructions
- Heat oven to 180 C° (350 F°) and fold a 20 cm (7.9 inches) loaf pan with parchment paper or grease with oil.
- Add all ingredients to a high speed blender or food processor and blend the oatmeal banana bread batter until smooth. The oats should become flour.
- If you desire, stir in (without blending) additional ingredients such as walnut chunks, pumpkin seeds or chocolate chips.
- Pour the batter into your prepared loaf pan. Bake in hot oven for 30 to 40 minutes, or until a toothpick inserted into the center of your oatmeal banana bread comes out clean. For a moist texture, do not overbake the loaf.
- Remove from the oven and let cool in the loaf pan for about 15 minutes. Finally, take it out of the pan and let cool completely before slicing.
Notes
- If you don’t have a blender, prepare this banana bread with oat flour. In a large mixing bowl, mash the bananas, stir with the wet ingredients and incorporate all dry ingredients.
- Use gluten-free rolled oats if necessary.
- For a nut-free version, replace nut butter with sunflower seed butter or tahini.
- After blending, feel free to add extra ingredients such as pieces of walnuts, pecans, pumpkin seeds or chocolate chips.
Nutrition
The post Oatmeal Banana Bread appeared first on MattsfitChef.
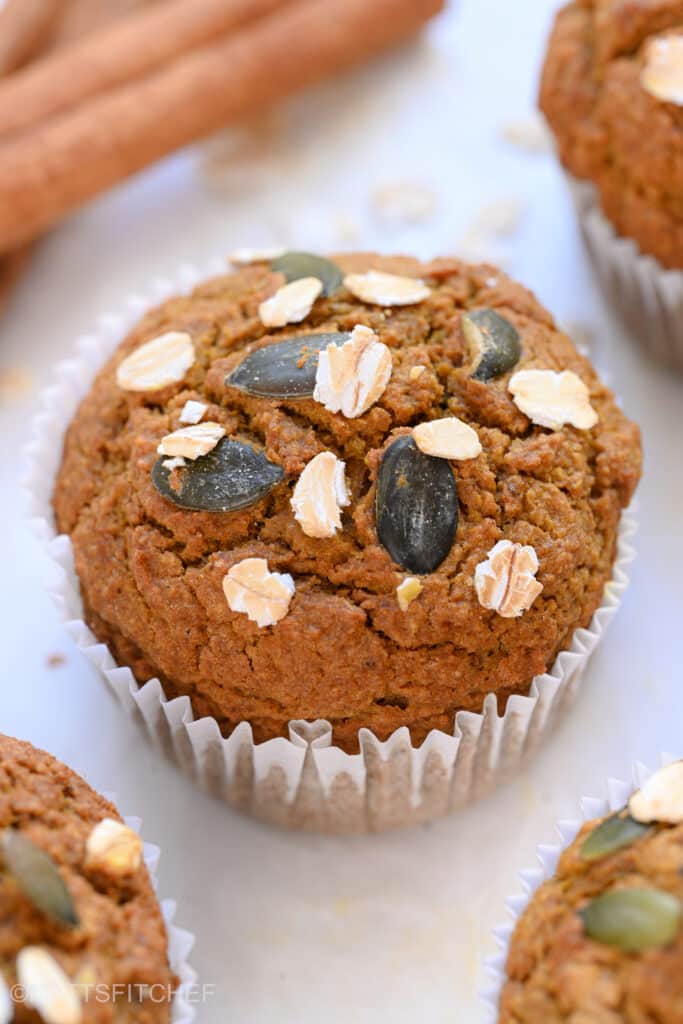
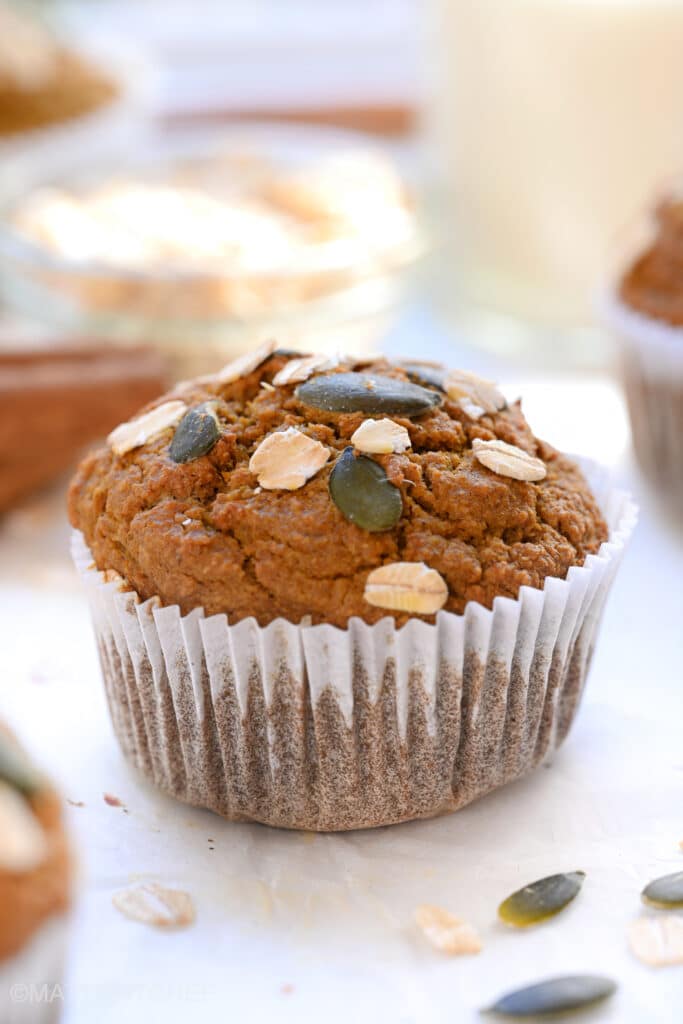
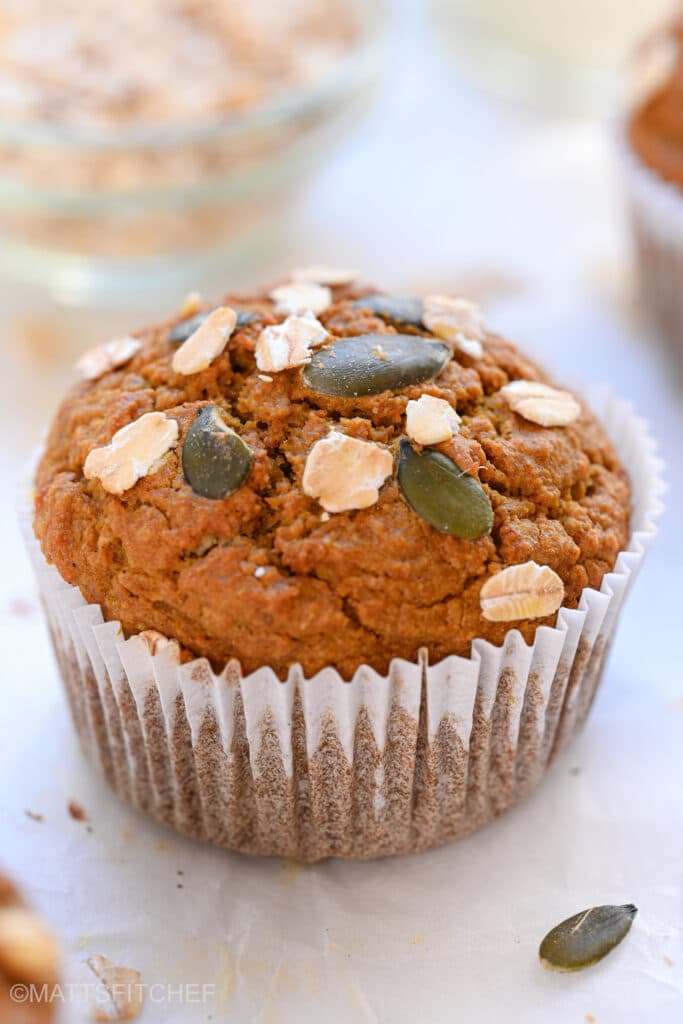
]]>The post Healthy Pumpkin Muffins appeared first on MattsfitChef.
]]>
Fall has officially begun. While I already miss Summer, deep in my soul I feel the excitement running through my veins. Cozy afternoons, Halloween, Thanksgiving and...Pumpkin! Pumpkin season is hands down one of the most magic moments of the year. From chocolate chip pumpkin bread to pumpkin cookies and nourishing bowls, I can probably say that pumpkin is one of my favorite foods ever. Besides its nutritional benefits, it tastes delicious in both savory and sweet recipes. Just like these healthy pumpkin muffins, probably the best muffins I’ve ever made. I obsessed with them, and you will love them too!
Why you will love these healthy pumpkin muffins
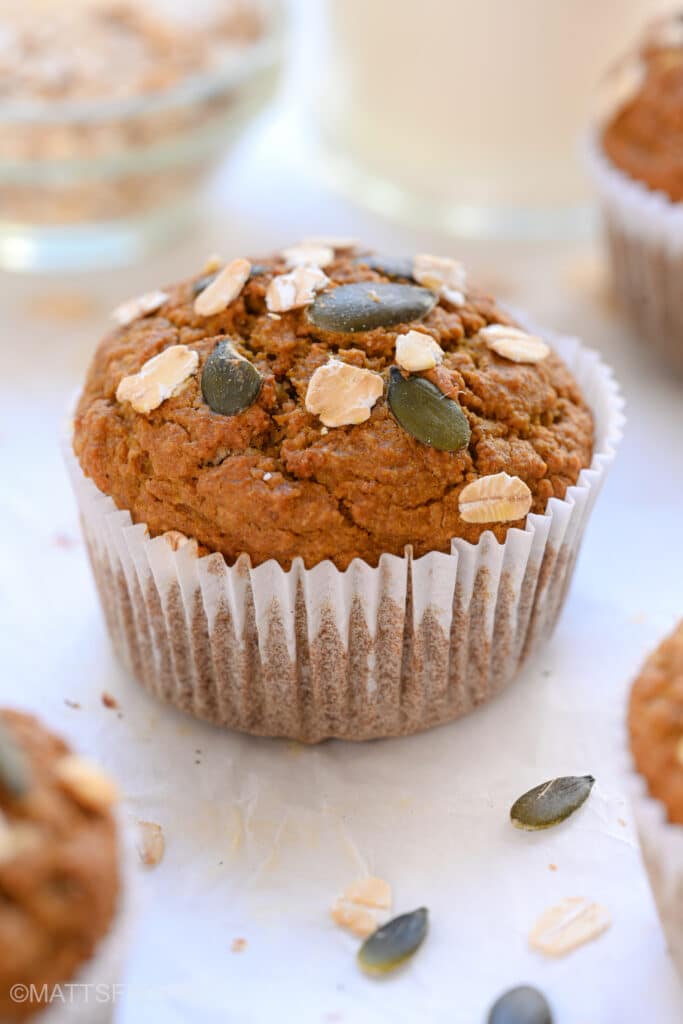
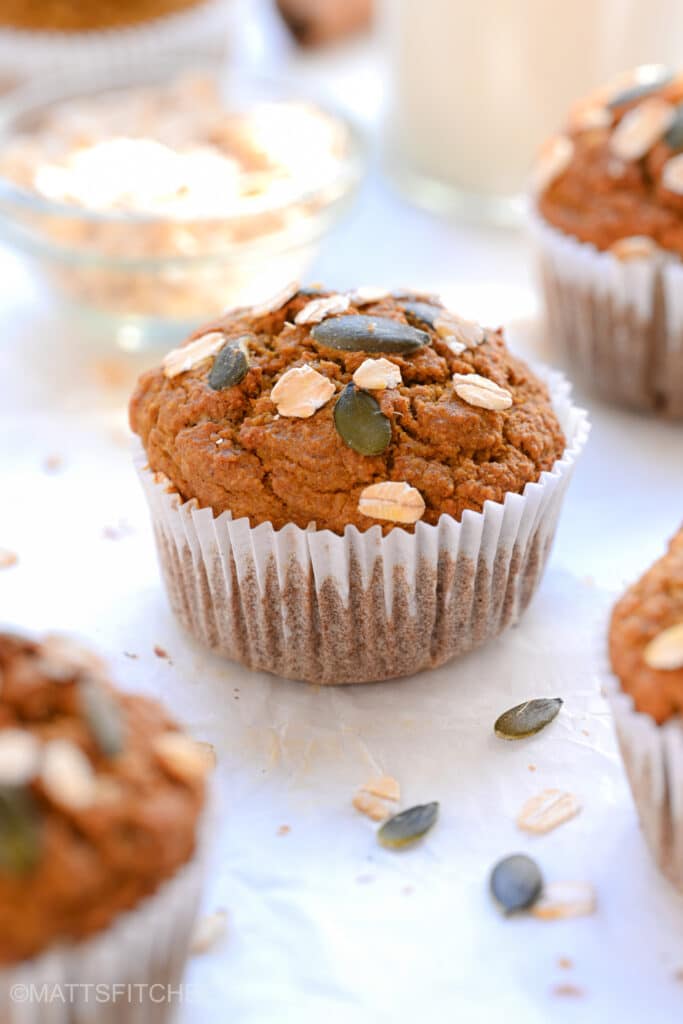
- Moist and delicious. This recipe packs all the warming flavors of Fall into soft and moist pumpkin oatmeal muffins. Everyone will love them, kids included!
- Healthy and nutritious. If you think that healthy desserts are boring, time to change your mind. These delicious muffins are high in dietary fibers, low sugar, lower in fats and rich in nutrients. Oats and pumpkin provide plenty of minerals and vitamins that are good for you.
- No refined sugar and no refined flour. Made with oats and maple syrup, this recipe is free from white flour and refined sugars. The prefect treat if you are trying to be more conscious about your diet!
- Gluten-free and dairy-free. Since there is no need for white flour or milk and butter, these pumpkin oat muffins are gluten-free and dairy-free. You can also make them vegan by replacing eggs with flaxseed eggs.
- One-bowl easy recipe. Healthy baking has never been that easy! Combine all the ingredients into a bowl, mix and bake until soft and fluffy. The real challenge is gonna be waiting while they are in the oven!
The ingredients for pumpkin oat muffins
- Eggs. The eggs will add moisture, flavor and improve textures. I recommend using two large fresh eggs, from free-range chickens if you can. For vegan pumpkin muffins, replace with two flaxseed eggs.
- Pumpkin purée. The best healthy muffins are made with pumpkin purée made entirely from pumpkin, without additional sweeteners or spices. Do not use pumpkin pie fillings, they are not the same. Out of convenience I got canned puree from the store but you are free to make it at home.
- Maple syrup. In this recipe, the maple syrup helps sweeten muffins in a more natural and healthy fashion (no refined sugar here!). You can substitute with honey, agave syrup, date syrup or coconut syrup. Granulated sweeteners such as brown sugar or coconut sugar will not work, you’ll need a syrup.
- Vegetable oil. I recommend opting for a neutral vegetable oil such as canola oil, avocado oil and coconut oil. Replace with melted butter if you desire.
- Oat flour. For healthier muffins without refined flours, this recipe uses oat flour. You can buy it from the store or make it at home; be sure to choose gluten-free oats if necessary. As an alternative you can use any other flour such as wholewheat flour, spelt flour or all purpose flour.
- Rolled oats. In addition to flour, you will need rolled oats (also quick oats work). Oat flakes give these muffins a unique texture, extra taste and plenty of nutrients such as fibers and minerals.
- Baking soda. This ingredient helps muffin rise and become fluffy. You can also use baking powder, but unfortunately the outcome won’t be exactly the same (less fluffy and slightly drier).
- Spices and flavors. A mix of cinnamon, nutmeg and vanilla extract will give your desserts the traditional flavors of Fall.
How to make oat flour at home
For healthy and gluten-free pumpkin muffins, this recipe uses oat flour. Oat flour is a great alternative to refined white flour or other flours that contain gluten (just be sure to use certified GF oats). The best thing is, you can also make it at home from rolled oats in case you can’t find it at the grocery store.
Add rolled oats or quick oats to a high speed blender and process until they have become flour. Depending on the power of your blender, this process may require a couple of minutes. The result should be a fine powder, or better said “homemade oat flour“!
How to make healthy pumpkin muffins with oats
- Combine wet ingredients. In a large bowl, beat pumpkin puree with eggs, maple syrup, oil and vanilla extract. Once beaten, whisk in the pumpkin spice mix and mix until smooth.
- Add dry ingredients. Using a rubber spatula or fork, stir in the flour, the oats, the baking soda and the salt. Mix wet and dry ingredients together until you get a smoot batter.
- Bake in hot oven. Fill ⅔ of each muffin liner with batter, sprinkle with oats and seeds on top if you desire, and bake in hot oven for 20 to 25 minutes. Do not overbake; they are ready when a toothpick inserted into the center comes out clean.
Storage information
To store gluten-free pumpkin muffins, first let cool completely over a wire rack. Once cooled, place in an airtight food container and keep at room temperature for a maximum of 3 days.
If you want oat muffins to last longer, place them in a sealable food container and refrigerate for a maximum of 4 days. Pumpkin muffins freeze very well too. To freeze, place in zipper bags and keep in the freezer for a maximum of 3 months. Before serving, thaw and reheat in hot oven until they are soft and warm.
Recipe tips
- Use fat for soft and moist pumpkin oatmeal muffins. A bit of canola oil, coconut oil or melted butter will significantly improve both tastes and textures.
- I recommend using baking soda instead of baking powder, it gives baked goods a moister and fluffier texture. If you don’t have it, also baking powder works but the texture won’t be as soft.
- For the best experience, eat your pumpkin muffins the day after making. As for pumpkin bread, all the spicy flavors will come out to convey a memorable taste.
- Include additional ingredients such as chocolate chips, walnuts, pecans or pumpkin seeds. Besides taste, they will create an irresistible experience of textures.
- When preparing the batter, be sure not to mix excessively. Overmixing batter will spoil the fluffy texture of your pumpkin oat muffins.
- Do not bake for too long. Keep an eye on the baking time, they should be done when a toothpick inserted into the center comes out clean. Overbaking muffins makes them hard and dry.
FAQ – Frequently asked questions
For a vegan treat, replace eggs with two flaxseed eggs. As there’s no dairy product in this recipe, you won’t need to implement further changes.
The secret for making gluten-free pumpkin muffins is choosing certified gluten-free oat flour and rolled oats.
First, prepare the pumpkin. You can decide whether to boil, steam, bake or air fry it. Once tender, place in a food processor and blend until smooth.
This healthy pumpkin muffin recipe is simple and versatile. Therefore, if you do not have oat flour you can substitute with whole wheat flour, spelt flour or all purpose flour.
The oil can be substituted with melted butter (dairy-free if you want). As mentioned before, for rich and moist muffins I do not recommend skipping the fat component.
For a high protein treat, replace 30 to 50 grams (1/3 to 1/2 cup) of the flour with a protein powder of your choice. I suggest vegan protein powder or casein, as they tend to be better for baking.
And if you looking for more, check out my protein pumpkin muffin recipe!
More healthy treats for Fall
- Chocolate chip pumpkin bread
- Apple cinnamon muffins
- Banana oatmeal muffins
- Pumpkin cookie dough
- Banana bread cookies
- Low calorie banana bread
- Healthy apple pancakes
- Pumpkin oatmeal cookies
- Healthy pumpkin pancakes

Healthy Pumpkin Muffins
Ingredients
Dry Ingredients
- 200 grams (2 cups) oat flour or (200 g – 1 ¾ cup) preferred flour
- 30 grams (⅓ cup) rolled oats
- 1 tsp baking soda or 2 tsp baking powder
- ¼ tsp salt
Wet Ingredients
- 2 large eggs
- 180 grams (¾ cup) pumpkin puree canned or homemade
- 100 ml (½ cup) maple syrup or honey
- 60 ml (¼ cup) canola oil or vegetable oil of choice
- 1 tsp vanilla extract
Pumpkin Spice Mix
- 1 tsp cinnamon
- ⅓ tsp nutmeg
- ¼ tsp ground ginger
- ¼ tsp ground cloves
Instructions
- Preheat oven to 180°C (350°F) and prepare a muffin mold with muffin liners.
- In a large bowl, beat pumpkin puree with eggs, maple syrup, oil and vanilla extract. Once combined, whisk in the pumpkin spice mix and mix until smooth.
- Using a rubber spatula or fork, stir in the flour, the oats, the baking soda and the salt. Mix wet and dry ingredients together until you get a smoot batter.
- Fill ⅔ of each muffin liner with the batter, sprinkle with oats on top if you desire and bake in hot oven for 20 to 25 minutes. Do not overbake; they are ready when a toothpick inserted into the center comes out clean.Let cool for at least 15 minutes before serving
Nutrition
The post Healthy Pumpkin Muffins appeared first on MattsfitChef.
]]>The post No Bake Protein Balls appeared first on MattsfitChef.
]]>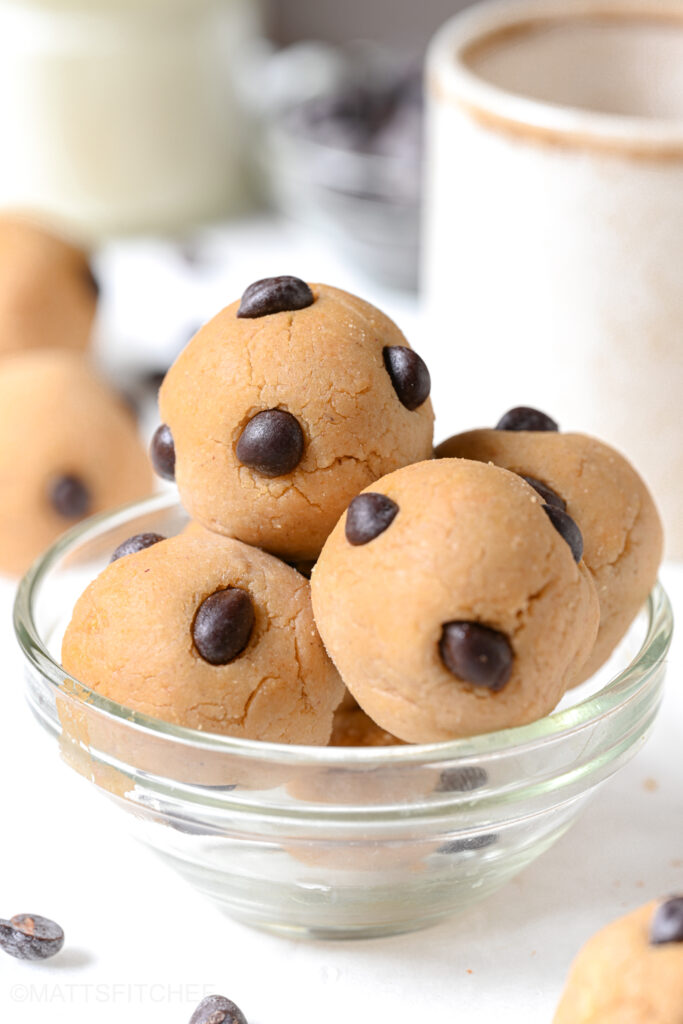
Every time I walk into a grocery store, the healthy snack area catches my attention. From bars to cookies, I love protein snacks so much that I would get them all. If it were not for the price – and the terrible nutritional values of most products. Tired of overpriced snacks loaded with sugars and trans fats, I decided to making my own versions: homemade protein bars, protein cookies and now even protein balls. After coming up with this recipe, I’ve been snacking on those bites of pure heaven on a daily. I love them and I’m pretty sure you will love them too.
Why these are the best protein bites
Here are five reasons why this is the best protein balls recipe ever.
- Quick and simple. Made in a bowl in just 5 minutes, this is an easy recipe that anyone can prepare. No need for mixer!
- Satisfying and delicious. Each bite is packed with flavors and nutrients that will satisfy your cravings without guilt. Definitely better than the ones you buy!
- Healthy and macro-friendly. These energy bites with protein powder are rich in fibers, minerals and vitamins that are good for your body.
- Diet-friendly. Whether keto, vegan or gluten-free, adapting these protein energy bites to your diet is incredibly simple. Read further for all details.
- Budget-friendly and convenient. Homemade protein balls are a cheap alternative to packaged foods. Make a large batch on the weekend and you’ll have protein snacks for the whole week!
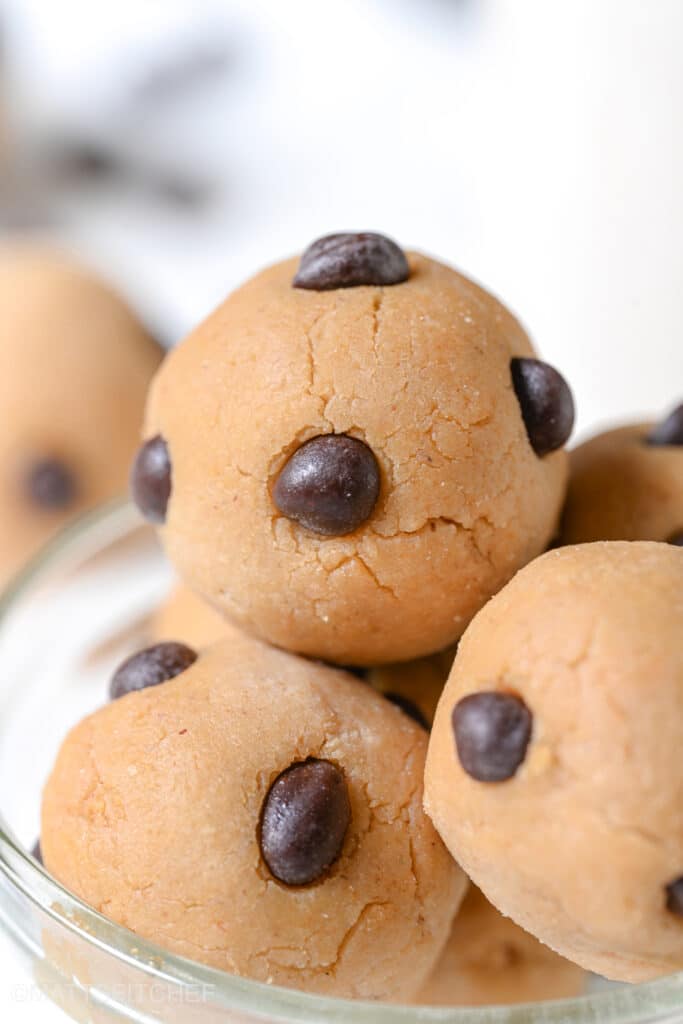
The ingredients for protein balls
Four simple ingredients, that’s all you need to whip up a batch of homemade protein balls. As this recipe uses no flour and no egg, it is completely vegan, gluten-free and allergy-friendly. In the following lines you are going to find a list of all the ingredients, plus more details and substitutes.
Rolled oats or oat flour. You can prepare this recipe with either rolled oats or oat flour. Both options work, but the texture will be slightly different: chewier for rolled oats and softer for oat flour. As an alternative you can also use almond flour, which will result in low carb energy bites. As these are no bake protein balls, they cannot be made with common all purpose flour or wholewheat flour.
Protein powder. This recipe uses vanilla soy protein powder, but you are free to choose any protein powder you like: vegan, whey or casein; flavored or unflavored are all great options. Keep in mind that based on the protein powder choice you may need to adjust the dough consistency:
- With either more nut butter, in the case of vegan protein and casein, or
- With more oats or oat flour, in the case of whey protein powder.
Nut butter. Choose your favorite nut butter, preferably smooth and creamy without added sugar or oil. For a cookie dough taste I like peanut butter, but also almond butter or cashew butter are phenomenal. If you are allergic to nuts, replace with sunflower seed butter or tahini.
Maple syrup. This is by far my favorite option when it comes to making healthy snacks or desserts. It adds natural sweetness and gives energy bites a delicate touch. You can replace with any other liquid sweetener, such as honey, agave syrup, date syrup or sugar-free syrups. Unfortunately this recipe does not work with granulated sweeteners such as brown sugar, coconut sugar or erythritol.
Optional ingredients
Besides the main ingredients, you can customize these protein balls to your own preferences. From chocolate chips to raisins, the options are endless. And if you still need ideas, here are some mix-ins.
- Chocolate chips. As they are lower in sugar I like extra dark chocolate chips, but feel free to use the one you like the most. Milk chocolate chips, white chocolate chips or sugar-free chocolate chips are all perfect.
- Nuts and seeds. Pieces of walnuts, pecans, almonds or a mix of seeds give an extra crunch and nutritional benefits to no bake protein balls.
- Dried fruits. I recommend raisins and cranberries, even better if you pair them with a mix of nuts and seeds.
- Cocoa powder. If you are looking for something chocolatey, try replacing part of the oat flour with about 25 g (1/4 cup) cocoa powder. Or try my other chocolate protein ball recipe!
Which protein powder for energy bites?
This recipe can be prepared with any protein powder you like. Vegan protein powder, casein or whey are all suitable, but they tend to influence the dough in different ways. Plant based protein powder and casein are more absorbent and can make your balls quite crumby – fix with more nut butter. On the contrary, whey protein powder dissolves very easily and makes your dough sticky – fix with additional oat flour.
Lastly, I recommends simple protein powder flavors – such as vanilla or chocolate – or unflavored options. This ensures that your snacks won’t taste too artificial.

Adapt the recipe to your diet
- Keto protein balls. Replace oats or oat flour with almond flour and use sugar-free maple syrup.
- Vegan protein balls. Prepare your no bake protein snacks with plant based protein powder.
- Gluten-free protein balls. Use certified gluten-free oats or substitute with almond flour and choose gluten-free protein powder.
- Nut-free protein balls. Instead of nut butter, make no bake protein bites with sunflower seed or tahini.
- Sugar-free protein bites. Swap out the maple syrup for sugar-free alternatives such as zero syrup.
Low calorie protein bites
Trying to lose weight and you’re looking for low calorie snack ideas? I got you. Making low calorie protein balls is incredibly simple, just implement the two following tweaks.
- Replace nut butter with powdered peanut butter. Mix the powder with little water until smooth, then use it to prepare your snacks.
- Sweetens with sugar-free syrups such as zero maple syrup or honey. Not only you will cut the sugars, but also the amount of calories that each bite provides.
How to make no bake protein balls at home
- Step 1: Prepare the dough. In a large bowl, combine all dry the ingredients – oat flour (or oats), protein powder and optionally the chocolate chips. Add the nut butter and maple syrup, then stir well until you get a soft dough. If, after mixing, the dough is still too crumbly, add some more nut butter. Or adjust with more oat flour if it is too sticky. This depends on the type of protein powder that you are using.
- Step 2: Form the balls. Shape some protein balls, then eat right away or place in an airtight food container. In the fridge, they will stay fresh for a maximum of five days.
Storage instructions
After making, transfer your no bake protein bites to a food container or sealable bowl and refrigerate. In the fridge, they will last for up to four days. For a longer storage, place in a zipper bag and freeze for up to three months. When you are ready to eat, remove from the freezer and let them thaw in the fridge.
Protein balls recipe – Troubleshooting
If it is dry crumbly, adjust the dough with more nut butter until it gets smooth. There are many factors that may influence the texture, first of which being the protein powder choice.
Opposite to the previous scenario, you may be struggling with wet and sticky doughs. In this case, restore the desired consistency with more oat flour (not protein powder).
Maybe you have the sweet tooth or maybe you opted for unflavored protein powder. In this case, fix the taste with more maple syrup or honey until your mixture reaches the desired sweetness level. As more maple syrup means more moisture, you may need more oat flour.
More homemade protein snacks
- Chocolate protein balls
- Cookie dough protein bars
- Protein frozen dessert
- Low calorie protein brownies
- Chocolate protein muffins
- Moist protein banana bread
- Pumpkin protein muffins
- Fudgy flourless protein brownies

No Bake Protein Balls
Ingredients
- 100 grams (1 cup) oat flour replace with rolled oats or almond flour
- 50 grams (½ cup) protein powder see notes*
- 120 grams (½ cup) nut butter peanut butter, almond butter, cashew butter, sunflower seed butter, tahini
- 3 to 5 tbsp maple syrup replace with honey, see notes*
Optional Ingredients
- chocolate chips
Instructions
- In a large bowl, combine all dry ingredients – oat flour (or oats), protein powder and optionally chocolate chips. Add the nut butter and maple syrup, then stir well until you get a soft dough, first with a fork and then using your hands.If, after mixing the dough is still too dry, add some more nut butter. Or adjust with more oat flour if it is too sticky. This depends on the type of protein powder that you are using (see notes for more details*).
- Shape some protein balls, then place in an airtight food container or in a sealable bowl.
- Store in the fridge for a maximum of five days.
Notes
- This recipe uses vanilla soy protein powder. You can use any protein powder you like: vegan, whey, casein or a mix of whey and casein. However, based on the protein powder choice you may need to adjust the dough with more nut butter (vegan protein and casein) or more oat flour (whey protein powder).
- I recommends simple protein powder flavors (such as vanilla or chocolate) or unflavored protein powder.
- If using unflavored protein powder, you may need to adjust the sweetness level with additional maple syrup or honey to your likings.
Nutrition
The post No Bake Protein Balls appeared first on MattsfitChef.
]]>The post Pumpkin Cookie Dough appeared first on MattsfitChef.
]]>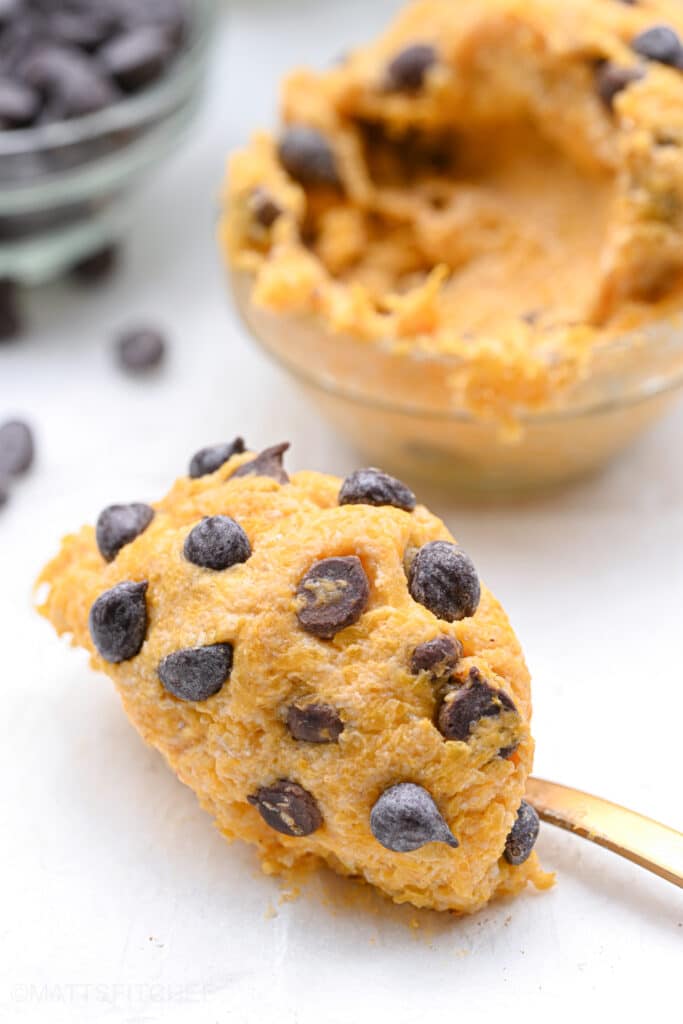
Recipe highlights
If you like pumpkin, this no bake cookie dough is for you. Combining taste and nutrition, this dessert dip is a recipe that has it all. Trust me, you’ll be making healthy cookie dough with pumpkin you everyday. Here are 5 reasons to love it.
- No-bake and easy. Whipped up in a bowl in minutes, this dip is perfect for quick and easy snacks and desserts.
- Healthy and nourishing. There’s no white flour, no refined sugar, no egg and no butter in this vegan cookie dough. Made with oats, pumpkin purée and nut butter, my version is packed with vitamins, minerals and good-for-you nutrients.
- Rich and tasty. Boring healthy desserts are a thing of the past with this recipe. Each bite provides an explosion of flavors, and it will feel like eating cookies by the spoon.
- Customizable and versatile. As a dessert or snack, just with chocolate chips or with extra nuts, this pumpkin cookie dough is a dish that you can tweak and adjust to your own preferences.
The ingredients for pumpkin cookie dough
This sweet pumpkin dip recipe is very simple. It only calls for a handful of common ingredients that are also very healthy. If not in your cupboard already, you can easily find everything at the local grocery store. Make sure you read further for more details.
- Pumpkin puree: I suggest using pumpkin purée made just from pumpkin, without additional sweeteners or preservatives. Do not confuse it with pumpkin pie fillings, they are not the same product. Out of convenience I like getting pre-made purée in cans, but you can also make it at home.
- Oat flour: As this is a no bake healthy cookie dough, it needs to be prepared just with ingredients that can be consumed raw. Differently from most flours that require heating, oat flour is safe to consume without baking. As an alternative you can opt for almond flour.
- Nut butter: My to-go choice is almond butter because I love how it pairs with pumpkin. Feel free to prepare your healthy dessert dip with any nut butter you like, such as peanut butter, cashew butter, walnut butter or sunflower seed butter if you can’t eat nuts. Preferably, opt for natural products without added sugar or oil.
- Maple syrup: Together with pumpkin, maple syrup is the main source of natural sweetness in this dip. You can replace with honey, agave syrup, date syrup or sugar-free syrups.
- Spices: Use a mix of cinnamon and nutmeg for a flavorsome pumpkin treat.
- Salt: A pinch of salt is a must in cookie recipes; it enhances tastes while balancing sweetness.
- Chocolate chips: This recipe uses extra dark chocolate chips. Replace with semisweet chocolate chips, milk chocolate chips or sugar-free chocolate chips if you prefer.
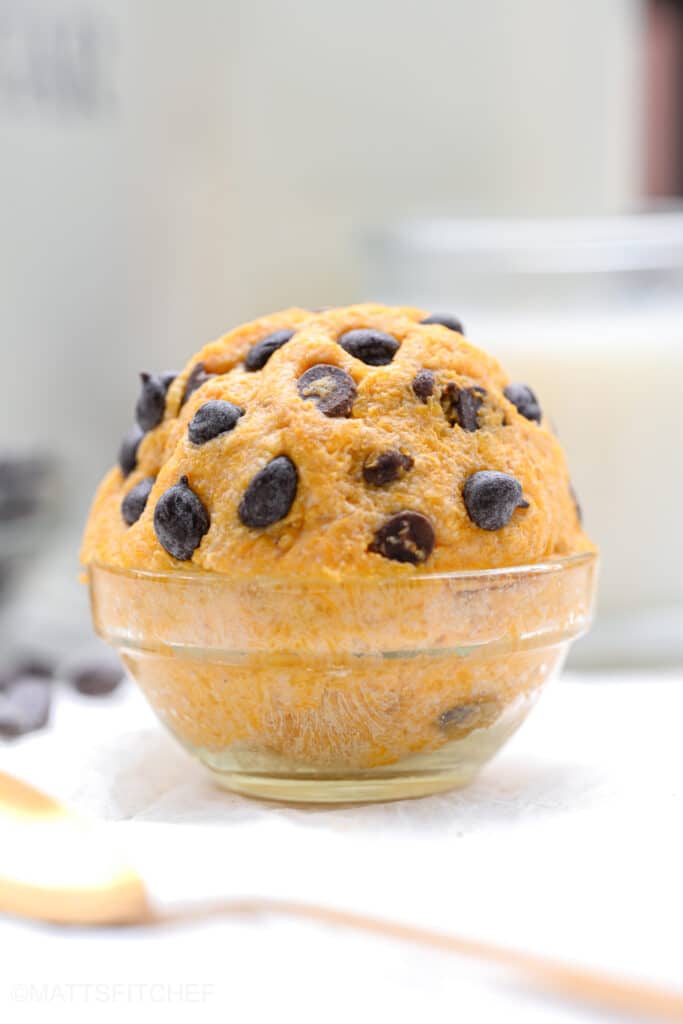
Recipe adaptations and substitutes
- High protein pumpkin dip: Replace oat flour with a protein powder of your choice and adjust the texture with more pumpkin purée or protein powder if it is necessary. I like vanilla casein protein powder.
- Low carb cookie dough: Instead of oats, prepare the dip with almond flour and you’ll whip up a delicious keto treat for your deserts or snacks.
- Low calorie pumpkin dip: Cut the calories in this recipe by replacing nut butter with powdered peanut butter. Mix the powder with little water until smooth and use it to make your low cal dough.
- Nut-free cookie dough: Use sunflower seed butter or tahini in case that you have an intolerance or allergy to nuts. I haven’t tried with melted butter yet, but I think it should work fine.
- Gluten-free cookie dip: Make your dip with certified gluten-free oat flour or opt for almond flour. If available, you may even use protein powder.
Optional add-ins
No-bake cookie dough is a versatile recipe that can be customized with optional add-ins. Whether you prefer classic chocolate chips, nuts, or more unusual choices like dried fruits or spices, the possibilities are endless. This flexibility allows you to tailor the dip to suit your taste and create a delicious treat that’s uniquely yours. So, get creative and experiment with mix-ins, or try one of the following options:
- Dark chocolate chips, milk chocolate chips or white chocolate chips.
- Pieces of walnuts, pecans, almonds or hazelnuts.
- A mix of dried fruits, such as raisins, cranberries or dried apples.
- Additional spices and flavors such as vanilla extract or grated ginger.
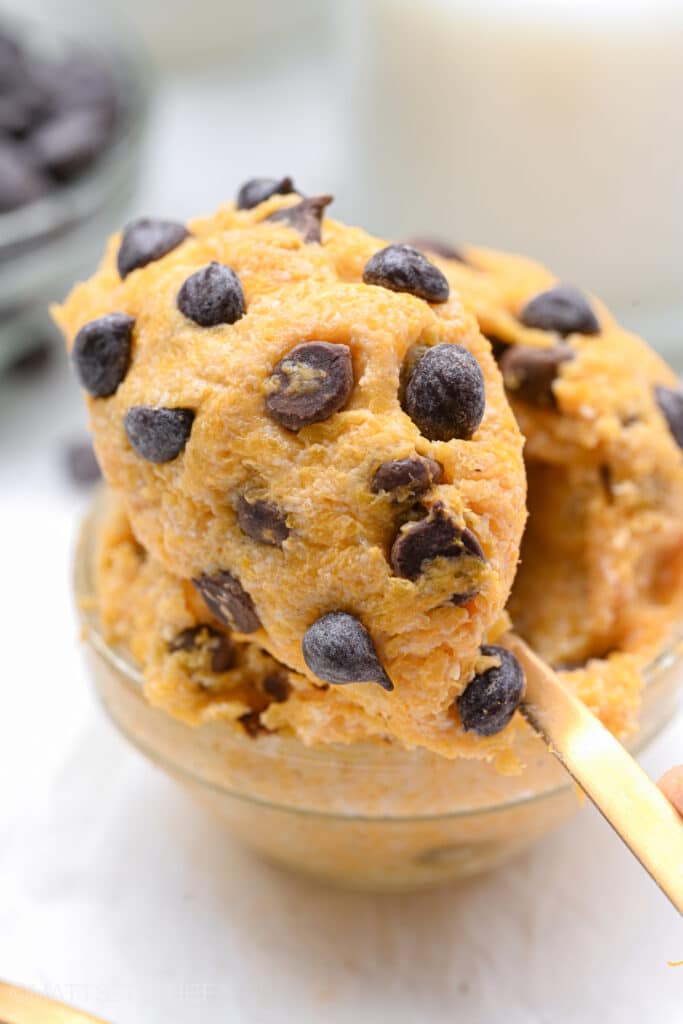
How to make pumpkin cookie dough
- Mix all ingredients. In a bowl, combine pumpkin puree with nut butter, maple syrup, cinnamon and nutmeg. Quickly stir the wet mixture until it gets smooth, then add oat flour and a pinch of salt. Mix well to get a smooth cookie dough. Mix in your chocolate chips of choice.
- Serve or store. Eat directly or seal and keep refrigerated for a maximum of 3 days.
Storage directions
After making, place any leftover in a small airtight food container and refrigerate. If you store it in the fridge, this cookie dough will last for up to 3 days. As an alternative you can freeze it for up to 3 months. Before eating, remove from the freezer and let thaw until the dip reaches its original texture.
When to eat pumpkin cookie dough?
This healthy pumpkin dip recipe comes in great for plenty of occasions. It is perfect enjoyed as a snack or as a late night dessert to satisfy your sweet tooth without guilt. Or why not eating it for breakfast?
MattsfitChef recommendation: Make pumpkin dip with protein powder and you’ll get a phenomenal post-workout snack for Fall.
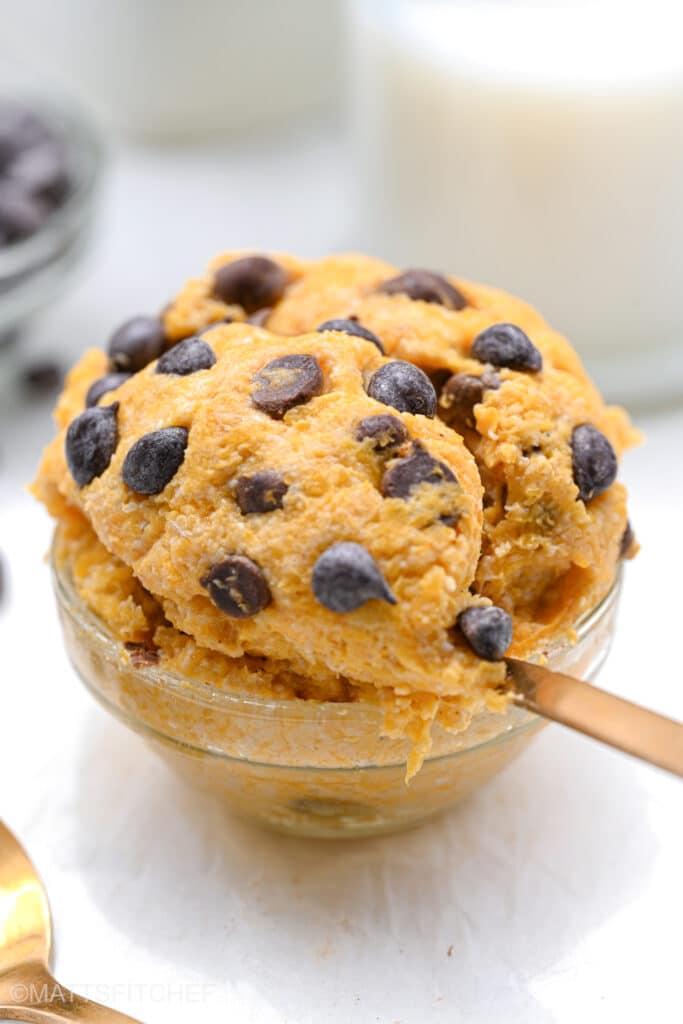
FAQ – Frequently asked questions
Cookie dough can be safely consumed raw without baking if it is prepared with the right flour. Great options are oat flour or almond flour, as both do not need to be heated before consumption.
Not all flours are safe to consume raw. While options such as all purpose flour or wholewheat flour require heating, oat flour and almond flour are perfectly fine.
Although I haven’t tried it yet, there should be no issue in baking it. I would shape some dough balls, flatten into cookies and bake in hot oven at 180°C (360°F) for about 8 to 10 minutes.
If you have leftovers, transfer to a sealable food container and refrigerate for a maximum of 3 days. As an alternative you can also freeze for as long as 3 months.
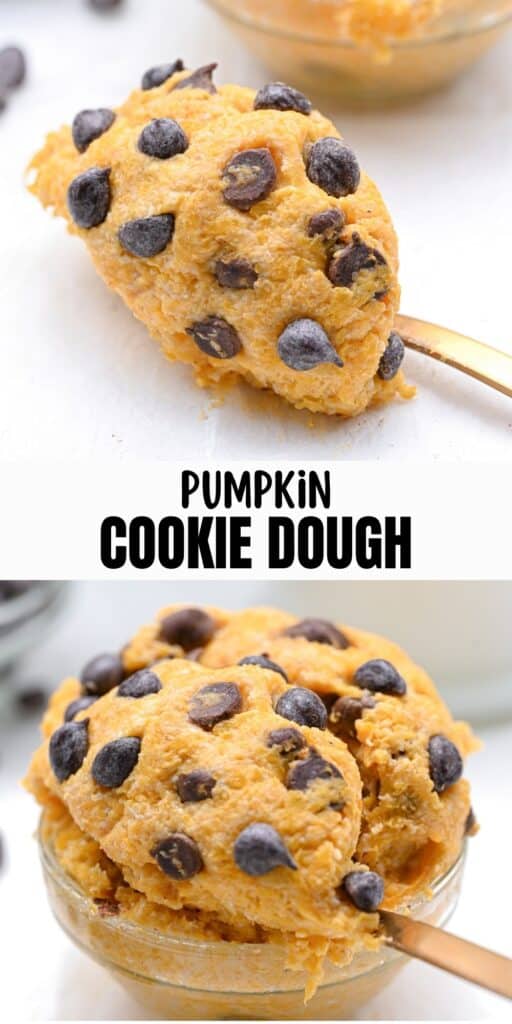
More healthy recipes for Fall
- Healthy apple pancakes
- Pumpkin oatmeal cookies
- Healthy pumpkin pancakes
- Chocolate chip pumpkin bread
- 3 ingredient pumpkin cookies
- Apple cinnamon muffins
- Oatmeal banana muffins
- Protein pumpkin muffins

Pumpkin Cookie Dough
Ingredients
- 80 grams (⅓ cup) pumpkin puree
- 30 grams (2 tbsp) nut butter almond, peanut or cashew butter
- 1 to 2 tbsp maple syrup or honey, to taste
- 30 grams (⅓ cup) oat flour or almond flour
- ⅓ tsp ground cinnamon
- a pinch of nutmeg
- a pinch of salt
- 1 tbsp chocolate chips
High Protein Alternative
- replace oat flour with the same amount of protein powder
Instructions
- In a bowl, combine pumpkin puree with nut butter, maple syrup, cinnamon and nutmeg. Quickly stir the wet mixture until it gets smooth, then add oat flour and a pinch of salt. Mix well to get a smooth cookie dough.
- Mix in chocolate chips.
- Serve directly or cover and keep refrigerated for a maximum of 3 days.
Nutrition
The post Pumpkin Cookie Dough appeared first on MattsfitChef.
]]>